
 Pin it
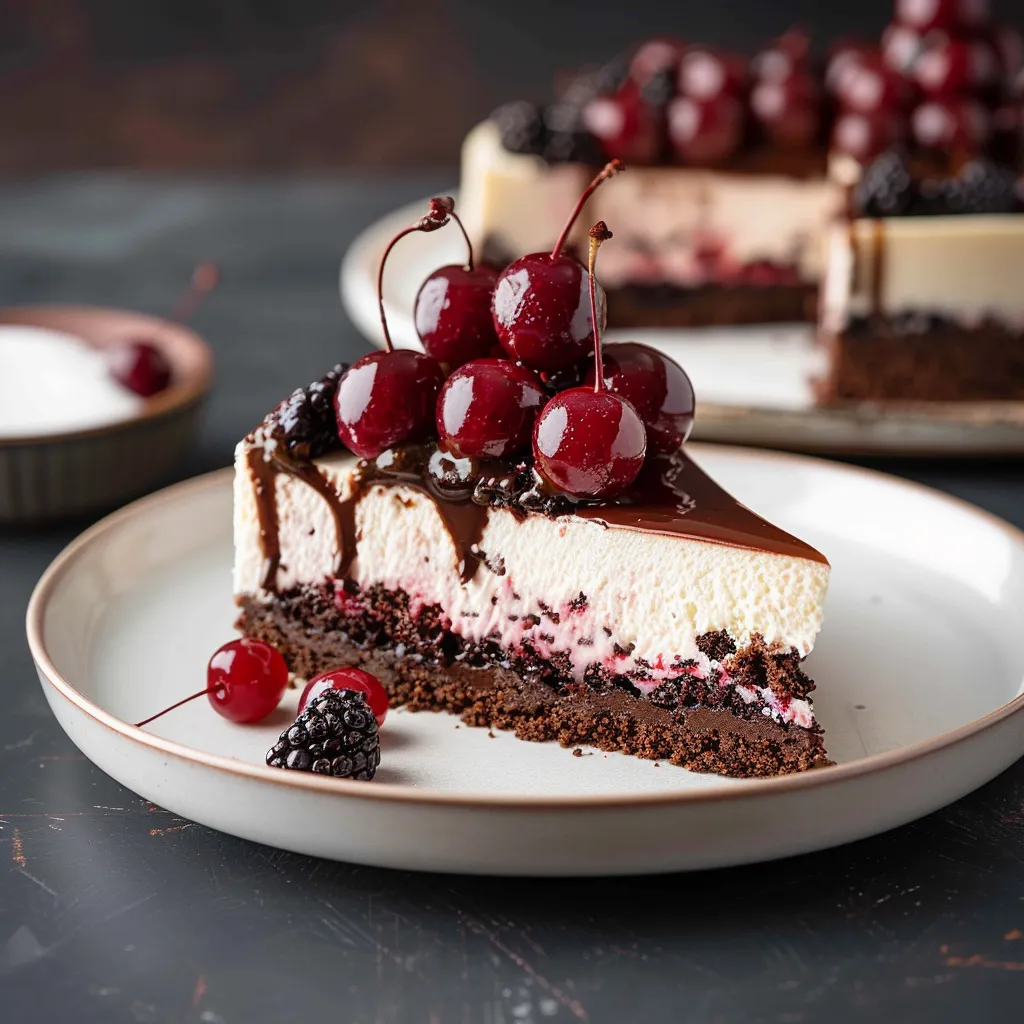
This indulgent Black Forest Cheesecake takes the traditional German dessert and turns it into a velvety, chocolate-loaded treat that'll wow your family or guests at any special event. The smooth chocolate cheesecake paired with tangy cherry topping creates a flavor combo you won't soon forget.
The first time I whipped this up was for my hubby's birthday as a switch from his usual Black Forest cake request, and now it's his yearly must-have. Everyone goes completely silent when they take their first bite - you'll just see closed eyes and happy faces around the table.
Ingredients
- Oreo cookies: They make an amazing chocolate base without adding extra sugar
- Cream cheese: Go for full-fat blocks to get the creamiest, richest outcome
- Semisweet chocolate chips: They deliver that distinctive black forest chocolate taste without overdoing sweetness
- Heavy cream: Gives a luxurious smoothness to both the filling and the topping if you choose
- Cherry pie filling: Brings that key sweet-tart flavor pop, and homemade tastes even better
- Vanilla extract: Makes the chocolate taste deeper, so pick the real stuff if possible
- Flour: Just a tiny bit helps the cheesecake stay stable and crack-free
Easy Preparation Guide
- Set Up Your Water Bath:
- Wrap your springform pan twice with sturdy foil to block water from getting in. For total peace of mind, either stick the wrapped pan in an oven bag or nest your 9-inch springform inside a 10-inch cake pan before placing in the water bath.
- Make Your Crust:
- Crush those Oreos, filling and all, until they're super fine. Mix them with melted butter until everything looks like wet sand. Press this mixture firmly across the bottom of your pan, making it nice and flat. Bake it for 8 minutes exactly, then let it cool completely on a rack.
- Get Your Chocolate Ready:
- Warm up the heavy cream until you see little bubbles at the edge but don't let it boil. Pour it right over your chocolate chips and don't touch it for about 3-4 minutes. This lets everything melt evenly. Then whisk it all together until it's smooth and shiny. Let it cool a bit while you work on the rest.
- Mix Your Cheesecake Filling:
- Beat your room-temp cream cheese until it's totally smooth with zero lumps. Add sugar and mix just enough to blend it in. Drop in eggs one at a time, making sure each one is fully mixed in before adding another. Don't forget to scrape the bowl between additions. Mix in the vanilla just until it's blended.
- Finish And Bake:
- Pour your cooled chocolate into the cream cheese mixture and stir until the color's completely even. Add the flour and mix just enough to work it in. Pour everything onto your cooled crust. Put it in your water bath and bake until the edges look set but the middle still jiggles slightly. Turn the oven off, open the door a crack, and leave it there for an hour to finish cooking gently.
- Let It Rest:
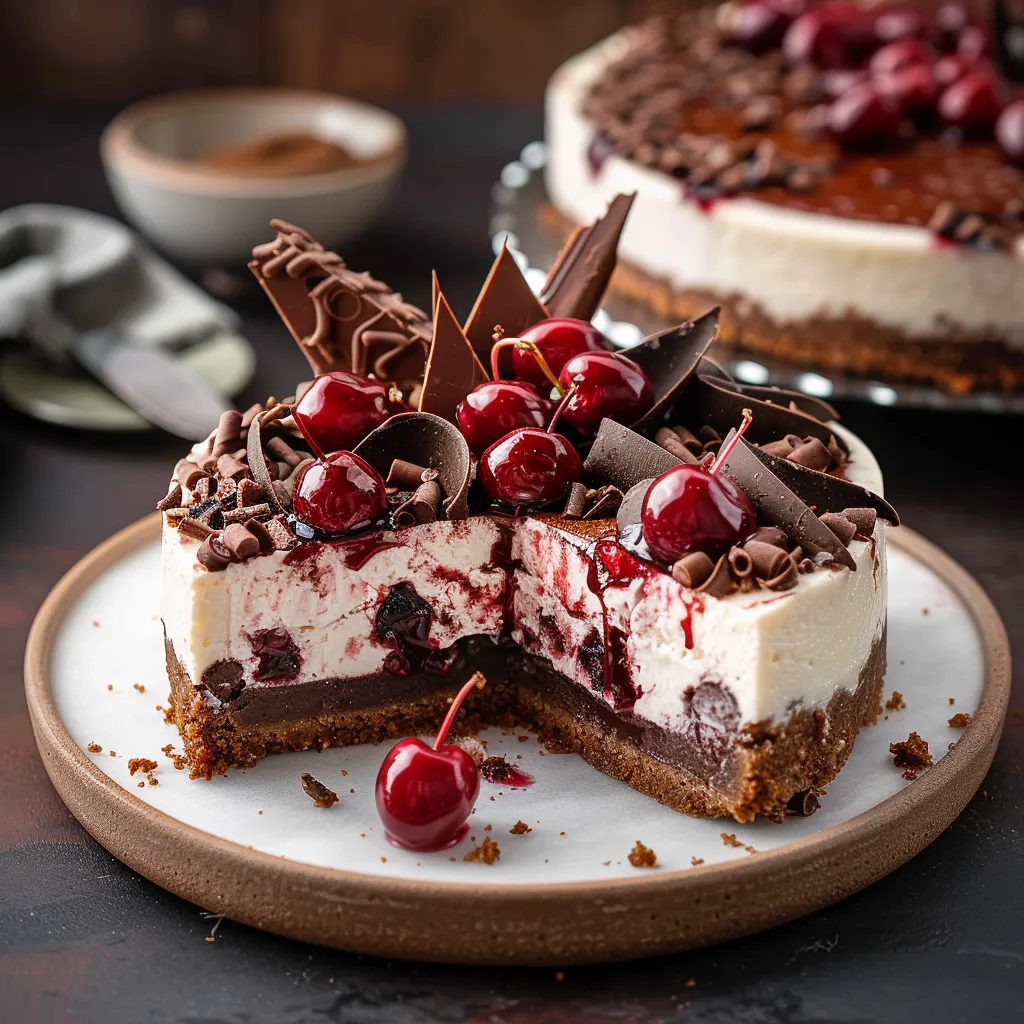
- Let your cheesecake cool all the way at room temp before putting it in the fridge for at least 8 hours. Trust me, this waiting game pays off big time. Before you serve it, add your cherry topping, whipped cream, and chocolate shavings for that classic Black Forest look.
 Pin it
The chocolate really shines in this dessert. I found that mixing good quality semisweet chocolate with just the right amount of sweetness creates that perfect black forest flavor my family can't get enough of. Even my German-born grandma said it topped any Black Forest cake she'd ever tried.
Authentic Touch With Kirsch
Real Black Forest cake includes kirsch, that clear cherry brandy that gives it a special taste. Want the genuine experience? Just mix 2-3 tablespoons of kirsch into your batter before it goes in the oven. The alcohol will cook away, leaving just a hint of cherry that makes the chocolate taste even better. Or try stirring some into your cherry topping for a more grown-up flavor kick.
Prep Ahead And Storage Ideas
This cheesecake actually tastes better after a day or two as all the flavors get friendly with each other. You can make it up to three days before your event and keep it in the fridge, just save the toppings for right before serving. Need to store it longer? Freeze the plain cheesecake by wrapping it tight with plastic wrap and then foil. It'll keep for three months. Just thaw it overnight in your fridge and add fresh toppings.
Ways To Serve
Take this amazing dessert to the next level by creating personal portions. Cut slices and set each one on a puddle of chocolate sauce. Top with your cherry mixture, a dollop of whipped cream, and some chocolate shavings. Want to get fancy? Use a paper doily to create a cocoa powder pattern on each plate. Serve with a tiny glass of kirsch or some coffee for a complete Black Forest experience.
Fixing Common Problems
Cheesecakes can be tricky, but don't worry. Got cracks even with your water bath? You probably mixed the filling too much and trapped air inside. Just mix until things are combined and no more. Is your cheesecake grainy? Your cream cheese wasn't warm enough. Always let dairy stuff sit out at least 30 minutes before starting. Want pretty slices? Dip your knife in hot water and wipe it clean between cuts.
 Pin it
Frequently Asked Questions
- → How do I keep cracks from forming during baking?
A water bath does the trick by creating a moist atmosphere. And make sure not to overmix, so air bubbles don't mess things up.
- → Can I just buy cherry pie filling instead of making it?
Totally! Canned cherry pie filling is a good shortcut, but going the homemade route gives a much brighter, fresher flavor.
- → What’s the minimum chilling time?
You’ll need at least 8 hours of fridge time. It helps everything set up and brings out the best flavors.
- → Can I use something other than Oreos for the crust?
Absolutely! Graham crackers or even other cookie crumbs can step in if Oreos aren’t your thing.
- → Is kirsch essential for this cake?
Nope, it’s optional! You can skip it, but adding it gives a little more traditional depth to the Black Forest vibe.
- → What’s the best way to store this treat?
Keep it wrapped up tightly in your fridge for up to 5 days. Need longer? Freeze it, and it’ll be good for 2 months.