
 Pin it
Fall-inspired chunky pumpkin granola makes a tasty seasonal snack you'll want to munch on constantly. This DIY batch blends the nutty goodness of pecans, pumpkin seeds and coconut shreds with warming fall spices, sweetened naturally with maple syrup and honey. What you get is a crunchy, addictive treat that's great with yogurt, splashed with milk, or sneakily grabbed by the handful when nobody's watching.
I stumbled on this mix three falls back and have whipped it up tons since then. My home fills with the smell of toasty oats and warm spices. Even my hubby, who usually stays away from anything that sounds healthy, sneaks into the jar when he thinks I can't see him.
Essential Granola Components
- Old Fashioned Rolled Oats: Make up the main part for awesome texture and sturdy clusters
- Pumpkin Seeds: Add a tasty nutty flavor with a satisfying crunch
- Pecans: Bring a soft, buttery taste that feels like fall in every bite
- Unsweetened Coconut Flakes: Give a hint of tropical flair and nice texture change
- Quinoa and Chia Seeds: Pack in some protein while making things more interesting
- Cinnamon, Pumpkin Spice, and Ginger: Work together for that classic autumn taste
- Pumpkin Puree: Gives real earthy sweetness and helps stick things together
- Maple Syrup and Honey: Make it sweet without any processed sugar
- Coconut Oil: Gets everything nice and golden crispy in the oven
- Vanilla Extract and Sea Salt: Make all the other flavors pop
Whipping Up Tasty Clusters
- Blending Dry Stuff:
- Start by throwing oats, pumpkin seeds, pecans, coconut flakes, quinoa, and chia seeds in a big bowl. Toss in cinnamon, pumpkin spice, and ginger, then mix it all up real good. This way every bite will taste the same.
- Mixing Wet Stuff:
- In another bowl, stir together pumpkin puree, maple syrup, honey, melted coconut oil, vanilla extract, and sea salt until it's smooth. The pumpkin might fight you a bit at first, but keep going until everything's mixed up nice.
- Putting It All Together:
- Pour your wet stuff over the dry stuff and fold it in with a spatula. Keep mixing until everything's coated with the pumpkin mixture. It should feel a bit sticky and clump up when you squeeze it.
- Getting Those Big Chunks:
- For super good clusters, gently squish teaspoon-sized clumps into loose balls before laying them on the baking sheet. This little trick really helps get those big pieces everyone loves.
- Baking It Right:
- Spread your mix evenly across two baking sheets lined with parchment paper. Stick it in a 325°F oven for about 40 minutes. Every 10 to 15 minutes, carefully flip the chunks instead of stirring them around. Let everything cool completely on the sheets before breaking it up, since they get really crispy while cooling down.
 Pin it
I really love throwing in dried cranberries after everything cools down. Their sour kick works so well with the sweet, spicy clusters. My grandma taught me to be patient and let granola cool properly, and it truly makes the difference between okay and amazing results.
Morning Meal Ideas
Make your breakfast better with this pumpkin mix layered in a glass with Greek yogurt and fresh berries. On lazy weekends, try sprinkling it over pumpkin pancakes with some maple syrup drizzled on top. When friends drop by unexpectedly, just pour out small bowls with milk for a quick snack that'll make your house smell wonderful.
Tasty Variations
Try a Mediterranean style by swapping pecans for pistachios and mixing in dried apricots after baking. If you like tropical stuff, use macadamia nuts with dried pineapple chunks and extra coconut. For a dessert version, toss in dark chocolate chips and dried cherries once everything has cooled down completely.
Staying Crunchy
Put your finished mix in glass jars with tight lids to keep it nice and crunchy. It'll stay good at room temperature for up to three weeks if sealed right. Keeping it in the fridge makes it last longer but might make it a bit less crispy. When it starts getting soft over time, just spread it on a baking sheet and warm it up at 325°F for ten minutes to bring back the crunch.
 Pin it
My time with this pumpkin spice mix started with plenty of burned batches and letdowns. After trying again and again, I found out that being patient matters most when making homemade granola. The lower heat and gentle handling make clusters that store-bought kinds just can't match. Now every fall starts with big batches that I give to friends and family who look forward to their yearly jar of what my niece calls 'fall in a container.'
Frequently Asked Questions
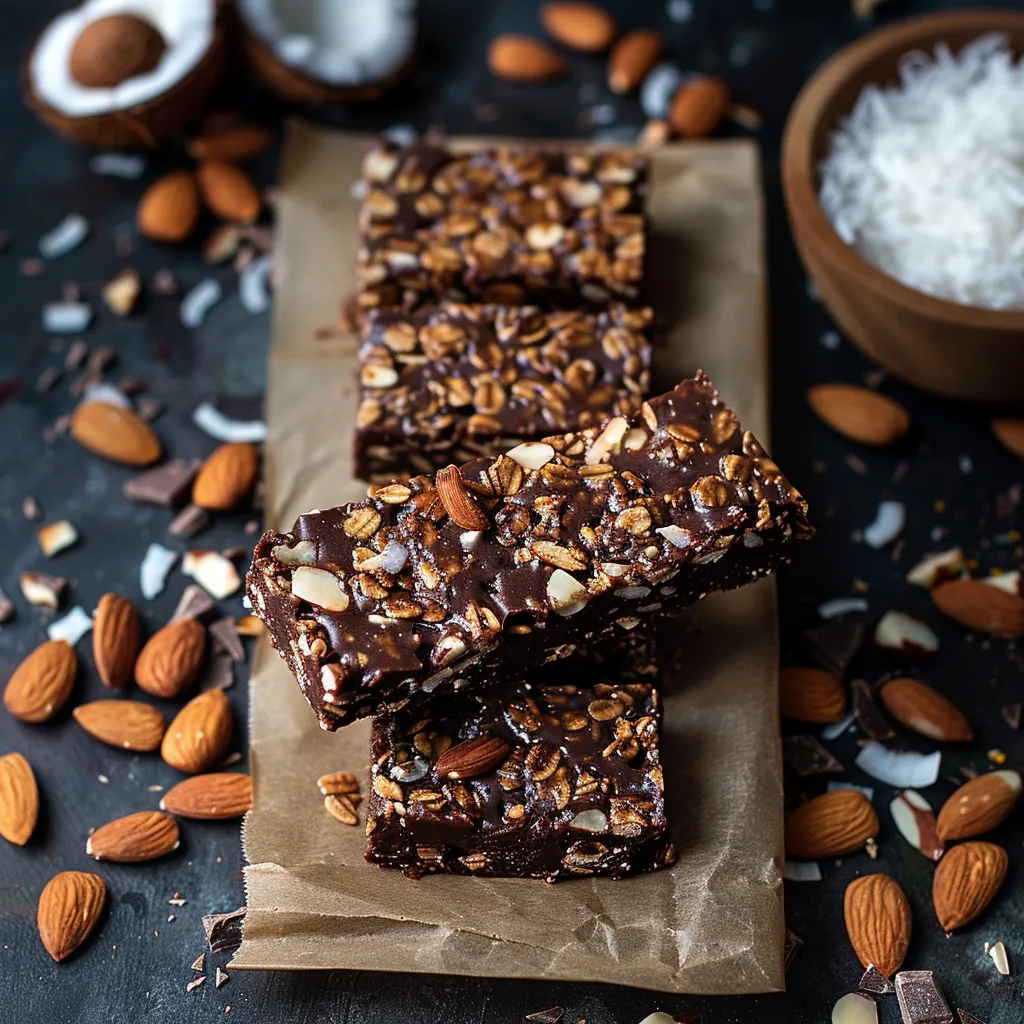
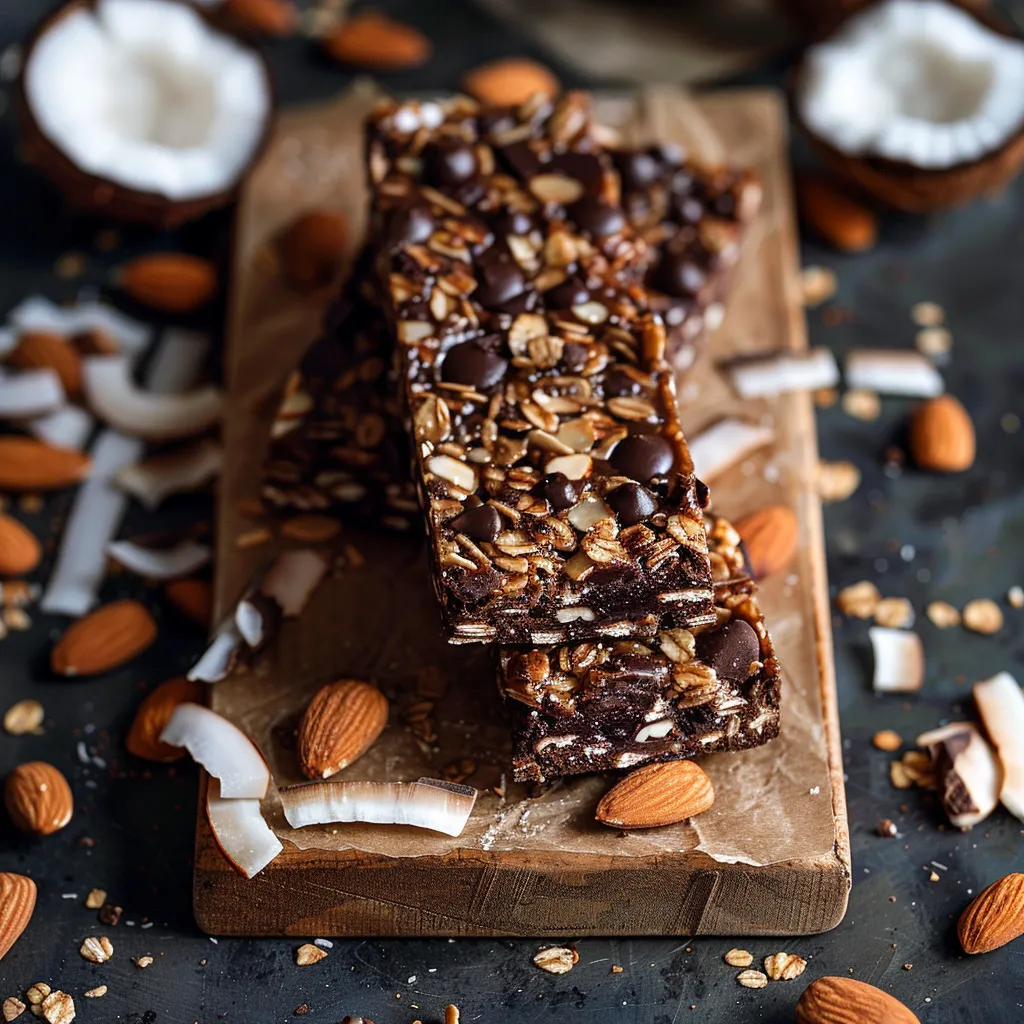
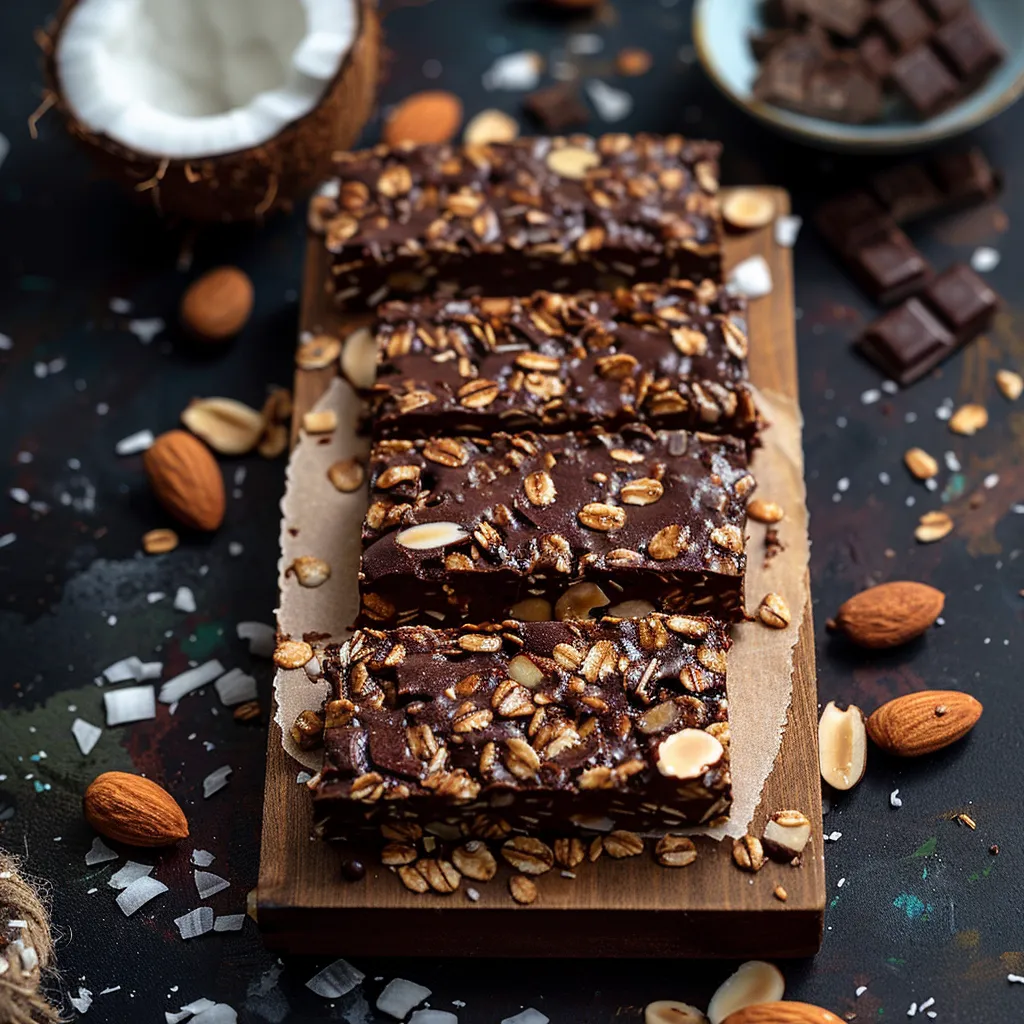
- → Can I make these Coconut Almond bars dairy-free?
- You can definitely make them dairy-free by swapping honey for the same amount of pure maple syrup or agave. Just make sure to grab dairy-free chocolate chips since many regular ones have milk products in them. With these two changes, your Coconut Almond bars will be totally plant-based.
- → Why can't I leave these bars at room temperature?
- These treats need to stay cold because coconut oil, which holds everything together, turns liquid when it's warm (around 76°F). Keeping them in the fridge makes sure they don't fall apart and keeps that nice chewy texture. Cold temps also stop the chocolate from getting messy, especially during summer.
- → Can I use something besides almond butter?
- For sure! While almond butter works great with the overall flavor, you can go with peanut butter, cashew butter, or sunflower seed butter if you need to avoid nuts. Each brings its own taste but will still work to hold everything together. Just pick a natural nut butter and mix it well first.
- → How long do these bars stay fresh?
- In a sealed container in the fridge, these bars stay good for about a week. If you want to keep them longer, wrap each one in wax paper or plastic and put them in a freezer container where they'll last up to 3 months. Let frozen bars sit in the fridge about 30 minutes before you eat them.
- → Why are my bars falling apart when I cut them?
- If they're crumbling, you probably didn't push down hard enough on the mix or didn't chill them enough. Make sure to really pack the mixture into the pan—the bottom of a measuring cup works great for this job. Also, wait until they're completely cold before cutting. If they still fall apart, stick them in the freezer another 15 minutes and try again.
- → Can I skip the coconut in this recipe?
- Sure, if you don't like coconut but still want to try these bars, just leave out the coconut flakes and add the same amount of extra oats, chopped nuts, or seeds like pumpkin or sunflower instead. For the coconut oil, you can use the same amount of melted butter or another mild oil like avocado oil.