
 Pin it
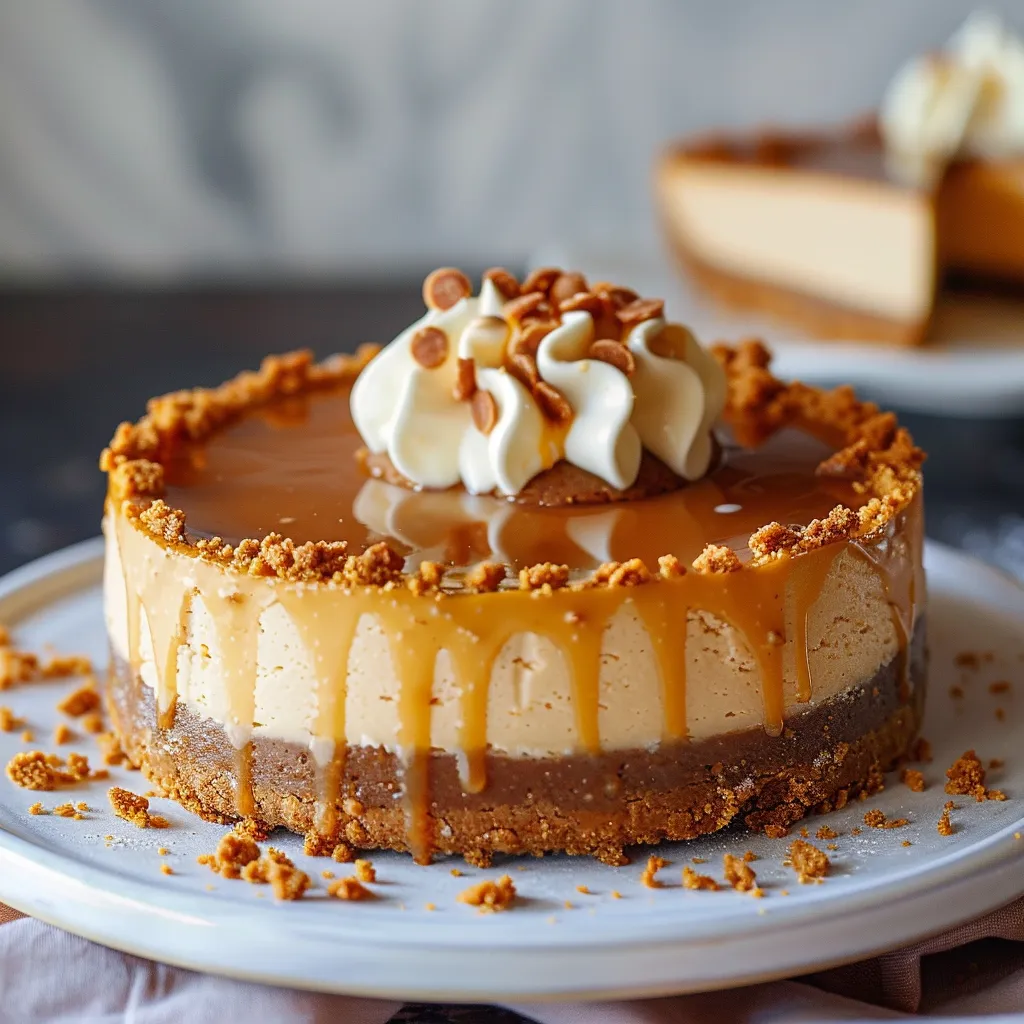
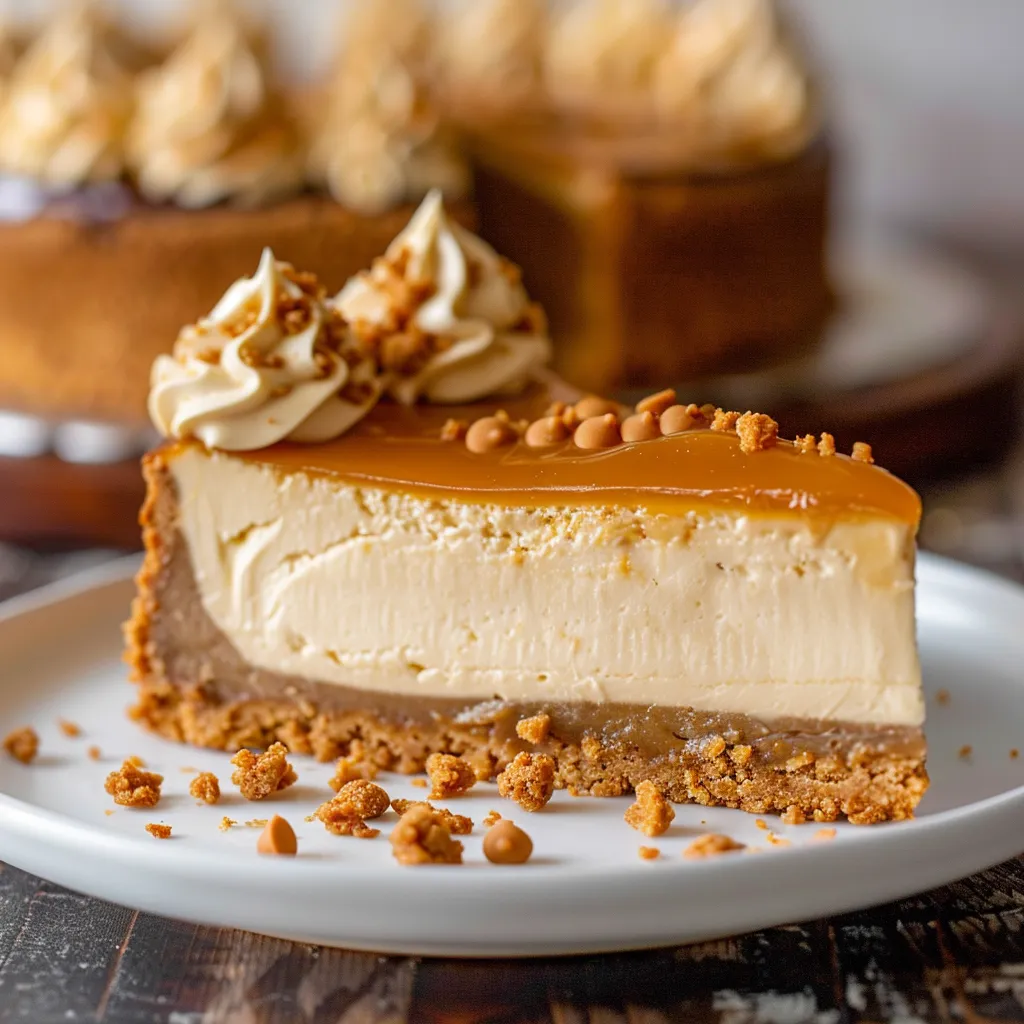
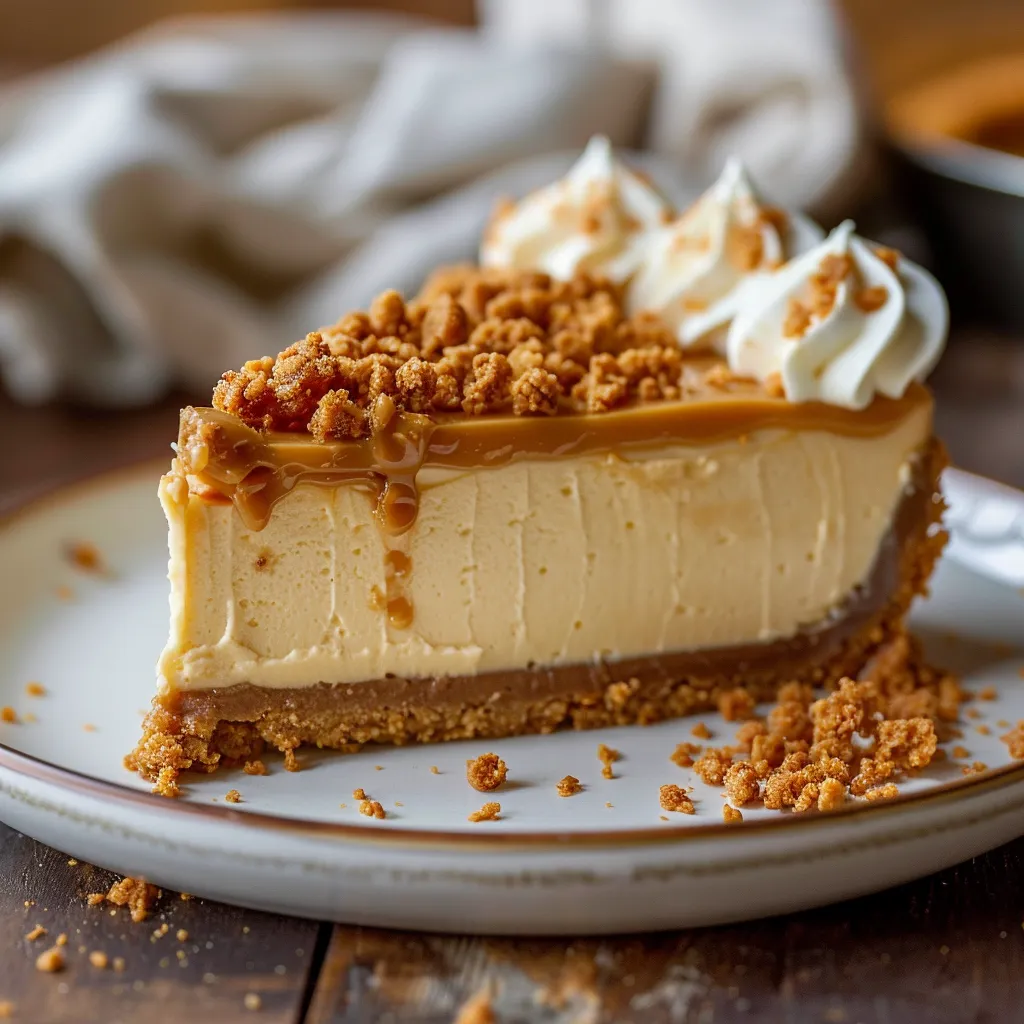
Butterscotch fanatics will swoon over this creamy dessert that turns a beloved candy flavor into a luscious treat. Each bite showcases multiple butterscotch layers - from the buttery graham base to the smooth center and shiny topping.
I tweaked this recipe dozens of times until it became my go-to dessert. Even my mother-in-law who always says she "doesn't care for desserts" asked for this at her birthday party.
Key Ingredients Breakdown
- Cream Cheese: Get the full-fat kind and let it sit out until soft for the creamiest filling
- Butterscotch Chips: Splurge on good ones for the richest taste
- Graham Crackers: Newly crushed ones make the crust way more tender
- Sour Cream: Cuts through sweetness with its zingy flavor
- Heavy Cream: The fat content here makes your topping turn out just right
- Brown Sugar: Brings those yummy caramel notes to both the base and filling
Crafting Your Dream Cheesecake
- Making The Base:
- First, crush your graham crackers into tiny, uniform bits. Mix them with melted butter and brown sugar until everything looks like damp sand. Push the mixture firmly into your pan with a flat measuring cup, starting from the middle and working outward and up the sides.
- Mixing The Filling:
- Make sure your cream cheese is completely room temp, then beat it until there's not a lump in sight before you add anything else. Go slow with each new ingredient and scrape down the bowl often. Let that butterscotch-cream mix cool totally before you add it or you'll end up with lumps.
- Setting Up The Water Bath:
- Wrap your springform pan twice with heavy-duty foil so water can't sneak in through any cracks. Put it in a bigger pan and pour warm water halfway up the sides of your cheesecake pan.
- Watching The Heat:
- Keep your oven at the same temp throughout cooking. When done, the middle should still wiggle a bit - it'll firm up as it cools. Follow the cooling steps exactly or you might get cracks.
- Adding The Topping:
- Pour your topping at just the right warmth for those pretty drips - too hot means it runs off, too cold means it won't spread nicely.
 Pin it
My little trick is adding a pinch of sea salt to the topping, which brings out the butterscotch flavor and keeps it from being too sweet.
Tasty Companions
Take this fancy cheesecake to new heights by pairing it with the right extras. Try pouring some warm salted caramel sauce over each piece for streams of golden goodness. Serve with fresh whipped cream that's just barely sweetened with a drop of vanilla and whipped until soft and fluffy for a nice light contrast. Coffee fans will love having this with a shot of espresso or butterscotch-flavored coffee - the warm, bitter coffee taste cuts through the sweetness and makes the caramel notes pop.
Smart Twists
Put your own spin on this showstopper without losing what makes it special. Try swirling dark chocolate throughout the filling before you bake it for a marbled look. Make a turtle-style version by mixing toasted pecans into the crust and finishing with both butterscotch and chocolate toppings. In the fall, mix warm spices like cinnamon, nutmeg, and ginger into the crust. For fancy occasions, try adding a layer of butterscotch cream between the cheesecake and the topping.
Keeping It Fresh
Keep your cheesecake tasting amazing by storing it right. Let it cool all the way at room temp, then put it in the fridge uncovered for an hour so it won't get wet from condensation. Then wrap it tightly in plastic with no air bubbles. If you want to freeze it, let it cool completely (leave off the topping), put it on a cardboard circle, wrap in plastic, then in heavy foil, and freeze for up to three months. Thaw in the fridge overnight, then add fresh topping before you serve it.
Plan-Ahead Tricks
Split up the work for this fancy dessert over a few days so it's not overwhelming. Make the crust up to two days early and wrap it well once it cools. Mix up the filling a day before you plan to bake, keep it covered in the fridge, and just bring it to room temp and give it a quick stir before pouring it in the crust. Get all your topping stuff ready ahead of time, but wait to mix and heat until right before serving for the prettiest look.
 Pin it
This Loaded Butterscotch Cheesecake stands out as a truly special treat. The mix of butterscotch elements - chips, pudding, and topping - creates an amazing caramel flavor in every mouthful. Whether you're serving it at a fancy dinner or a family get-together, this cheesecake always brings smiles and second helpings around the table.
Frequently Asked Questions
- → Why should I use a water bath for my cheesecake?
- The water bath gives off gentle heat all around, stopping those annoying cracks and making your cheesecake super smooth and velvety.
- → Can I pop this cheesecake in the freezer?
- You bet! It'll keep for up to 3 months without the top layer. Just wrap it tightly and let it thaw in your fridge.
- → Why can't I use cold ingredients?
- Ingredients at room temp mix together way better and won't leave you with those pesky lumps in your cheesecake mix.
- → Can I switch up the crust?
- For sure! Try crushed vanilla wafers instead of graham crackers for a tasty twist.
- → How do I tell when my cheesecake is ready?
- The middle should look mostly firm but will still wobble a tiny bit when you give the pan a gentle shake.