
 Pin it
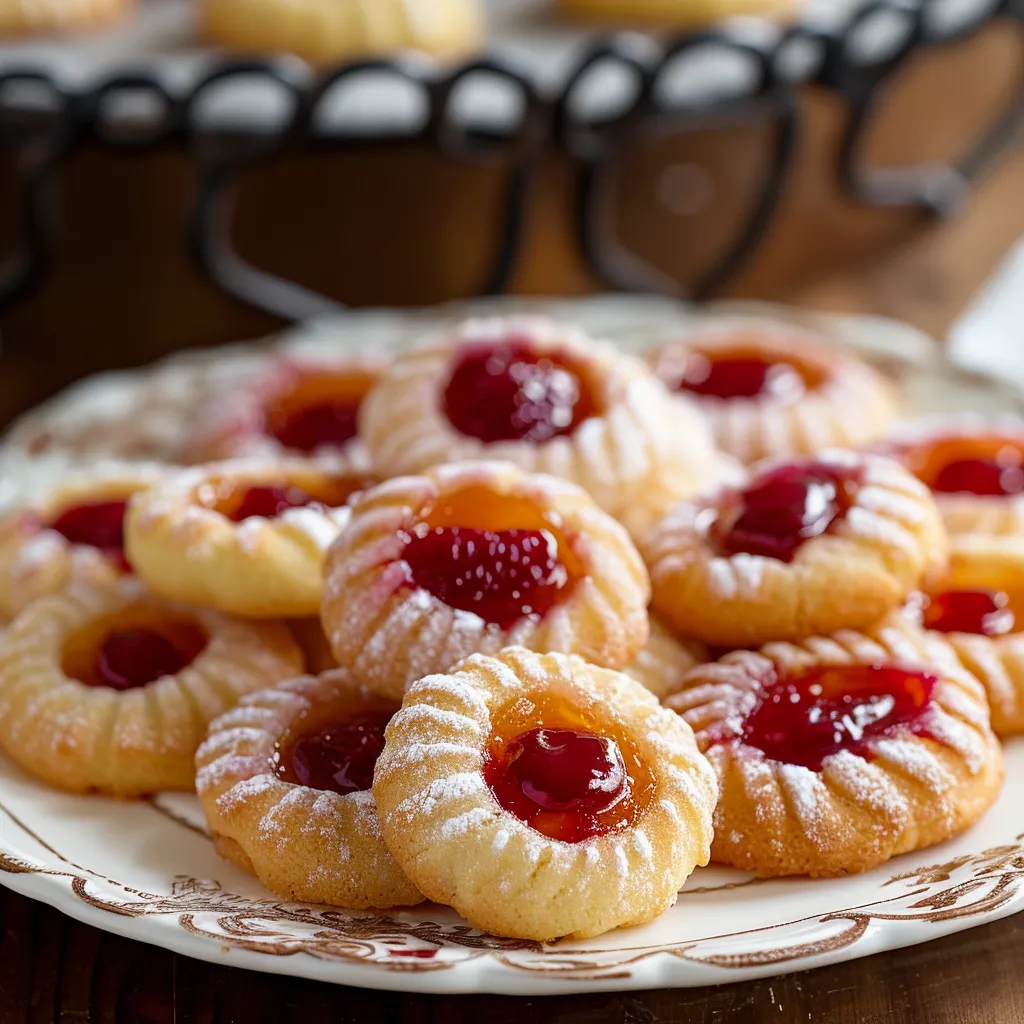
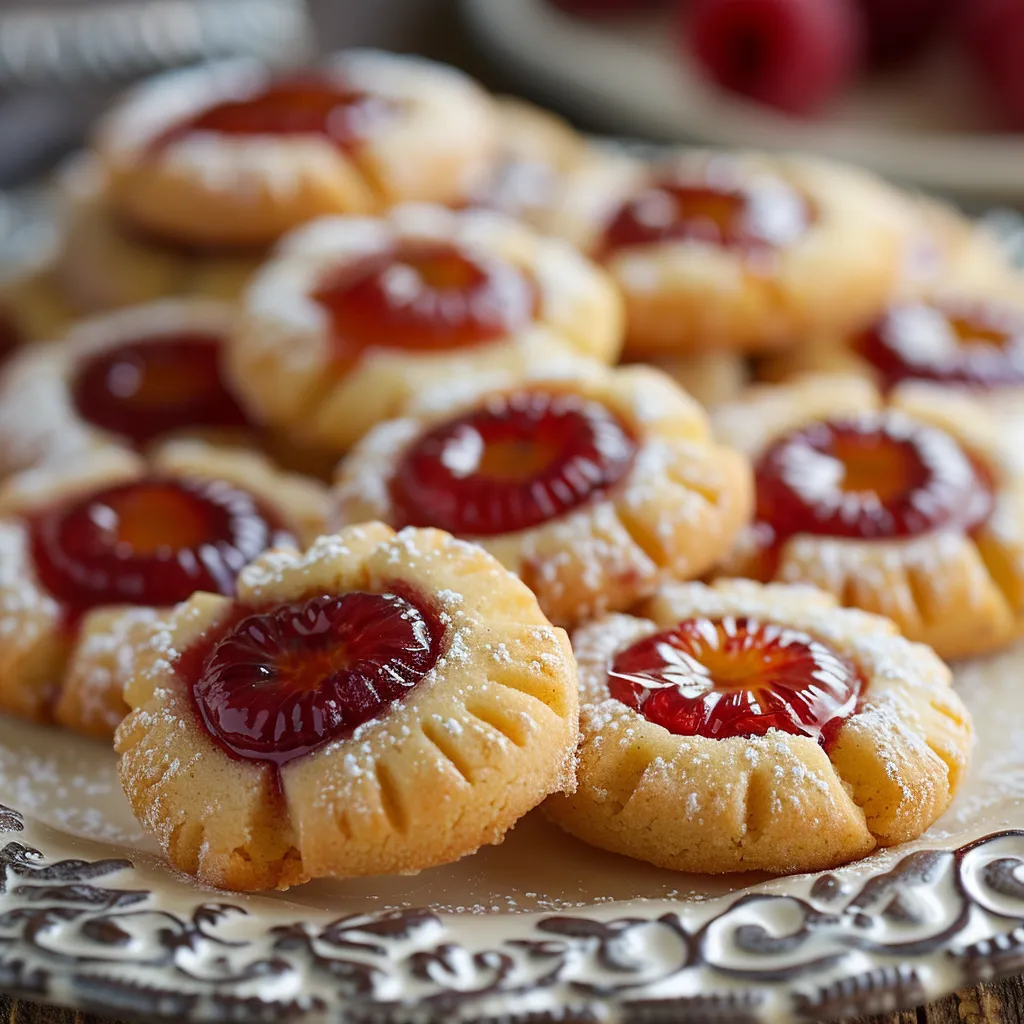
Soft and crumbly apricot raspberry thumbprint treats melt right in your mouth with their vivid fruit centers for a truly delicious bite. These traditional shortbread-type goodies need only six basic ingredients and very little work, so even beginners can whip them up with no trouble.
Key Cookie Ingredients
- Salted Butter: Gives rich taste and makes sure the cookies stay soft and tender.
- Granulated Sugar: Brings sweetness that doesn't overpower your jam flavors.
- Egg Yolk: Adds richness and keeps everything stuck together nicely.
- Vanilla Extract: Boosts other flavors with its warm, fragrant touch.
- All-Purpose Flour: Makes the perfect cookie structure while keeping each bite delicate.
- Fruit Jam: Brings tangy flavor and pretty color that catches the eye.
- Powdered Sugar: Creates the foundation for a fancy optional topping.
- Half and Half: Gets the topping to just the right thickness for a pretty drizzle.
- Additional Vanilla: Ties the finishing touch together with matching flavor.
Simple Cookie Making Steps
- Butter Getting Ready:
- Make sure your butter's completely soft. Mix it with sugar for three minutes till it's light and fluffy.
- Mixing Wet Stuff:
- Put in egg yolk and vanilla, stirring them in well. Scrape the bowl sides so everything mixes evenly.
- Adding the Flour:
- Pour in flour and mix slowly until dough forms. Don't mix too much or cookies won't be tender.
- Shaping Your Cookies:
- Roll small tablespoon-sized balls and put them on your lined cookie sheet. Push your thumb or a melon baller in the middle to make a dent.
- Fast Cooling Trick:
- Stick cookies in the freezer for 30-45 minutes so they won't spread out.
- Getting Ready to Bake:
- Heat oven to 350°F. Fill each dent with jam and bake 14-18 minutes until edges turn slightly golden.
- Adding Pretty Topping:
- Stir powdered sugar, half and half, and vanilla together. Drizzle it over cookies after they've cooled.
 Pin it
Tasty Filling Options
Go for blackberry jam if you want something tangy, or use strawberry jam with red and green sprinkles for Christmas treats. You can try fig or passion fruit jam when you want something fancy.
Pretty Serving Ideas
Set them out on a multi-level platter to show off their colors or pack in cute tins for gifts. Serve alongside tea and matching jam for a themed snack time.
 Pin it
These thumb cookies perfectly blend buttery goodness with bright fruit jam in a way that's always a hit. They're a timeless treat that'll wow everyone who tries them.
Frequently Asked Questions
- → Can I use unsalted butter for these thumbprint cookies?
- You can totally swap in unsalted butter instead of the salted kind in this recipe. Just toss in about ¼ teaspoon of salt with your flour to keep the taste right. The salt really brings out that buttery flavor and balances the sweetness from the jam. Either way, just make sure your butter isn't cold—it needs to be nice and soft at room temp for the best results when mixing.
- → Why did my thumbprint cookies spread too much during baking?
- There are a few things that might've gone wrong if your cookies flattened out too much. Maybe you didn't chill the dough long enough—that 30-45 minutes in the freezer (or 1½ hours in the fridge) really matters for setting the butter. Your butter might've been too soft when you started. Too much sugar can also make them spread. And don't forget about your flour—not enough can lead to flat cookies. For cookies that hold their shape, follow the chilling time, use butter that's soft but not melty, and measure everything carefully.
- → Can I make these thumbprint cookies ahead of time?
- Yes you can! These cookies work great for planning ahead. You've got a few ways to go: 1) Mix up the dough, form the cookies with the dents, and pop them in the freezer until they're hard. Then bag them up and they'll keep frozen for 3 months. Just bake them straight from frozen, adding a couple minutes to the time. 2) Bake them completely, let them cool all the way, and store in a sealed container at room temp for 3 days or in the fridge for 5 days. 3) If you want to add the glaze, it's best to wait and do that right before you serve them so it looks fresh.
- → What's the best way to create the perfect indent in thumbprint cookies?
- While your thumb works just fine (that's how they got their name), you can grab a few things from your kitchen drawers that'll make more even dents. Try a melon baller, the round end of a wooden spoon, a wine cork, or even a measuring teaspoon. For the best-looking cookies, make a dent before you chill the dough, then check after chilling to see if you need to push down again before adding jam. You want the hole deep enough to hold your jam but not so deep that it cracks the dough or pokes through the bottom.
- → Why did my jam bubble over during baking?
- When jam spills over, you've probably put in too much or used a really runny jam. Here's what works better: 1) Just use ¼-½ teaspoon of jam per cookie, keeping it below the edge of the dent. 2) If your jam seems too thin, cook it in a small pot for 3-5 minutes to thicken it up before using. 3) Make your dents a bit wider and deeper to give the jam more room. 4) Some jams just bake better than others—apple, apricot, and strawberry usually stay put pretty well.
- → Can I use homemade jam for these thumbprint cookies?
- Homemade jam works great in these cookies and adds that special homemade touch! If your homemade jam seems runnier than store-bought kinds, you might want to simmer it for a few minutes to get rid of extra liquid. This helps keep it from bubbling over while baking. Let it cool completely before putting it in your cookies. Homemade jam usually packs more flavor than the store-bought stuff, which makes these simple cookies taste even better.