
 Pin it
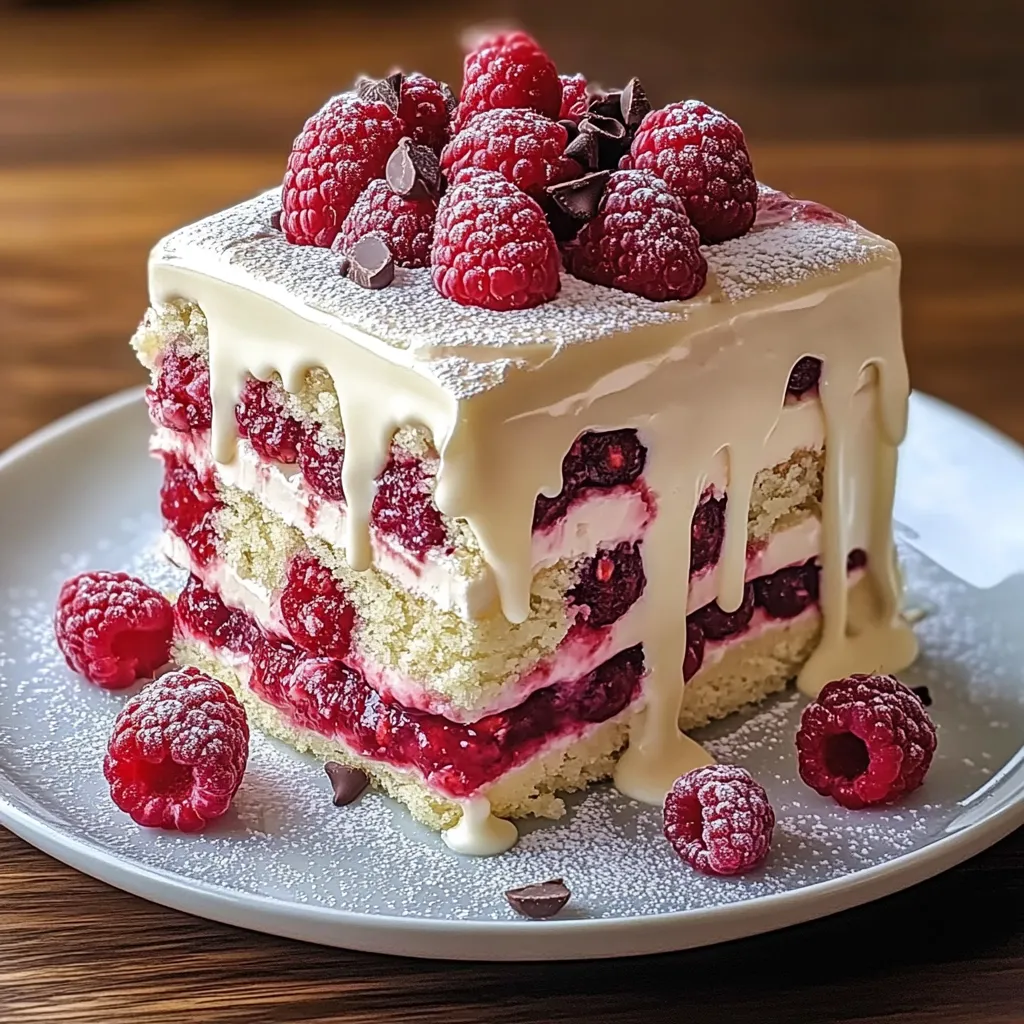
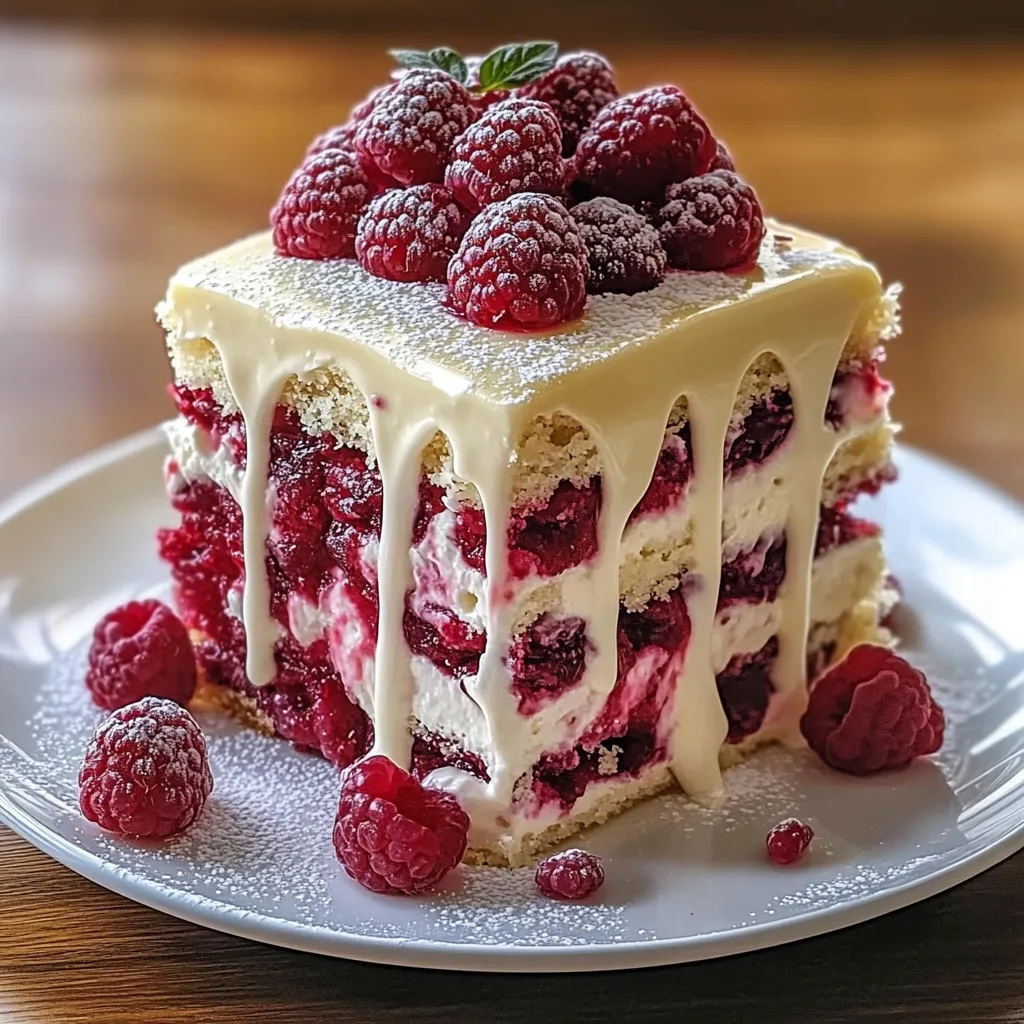
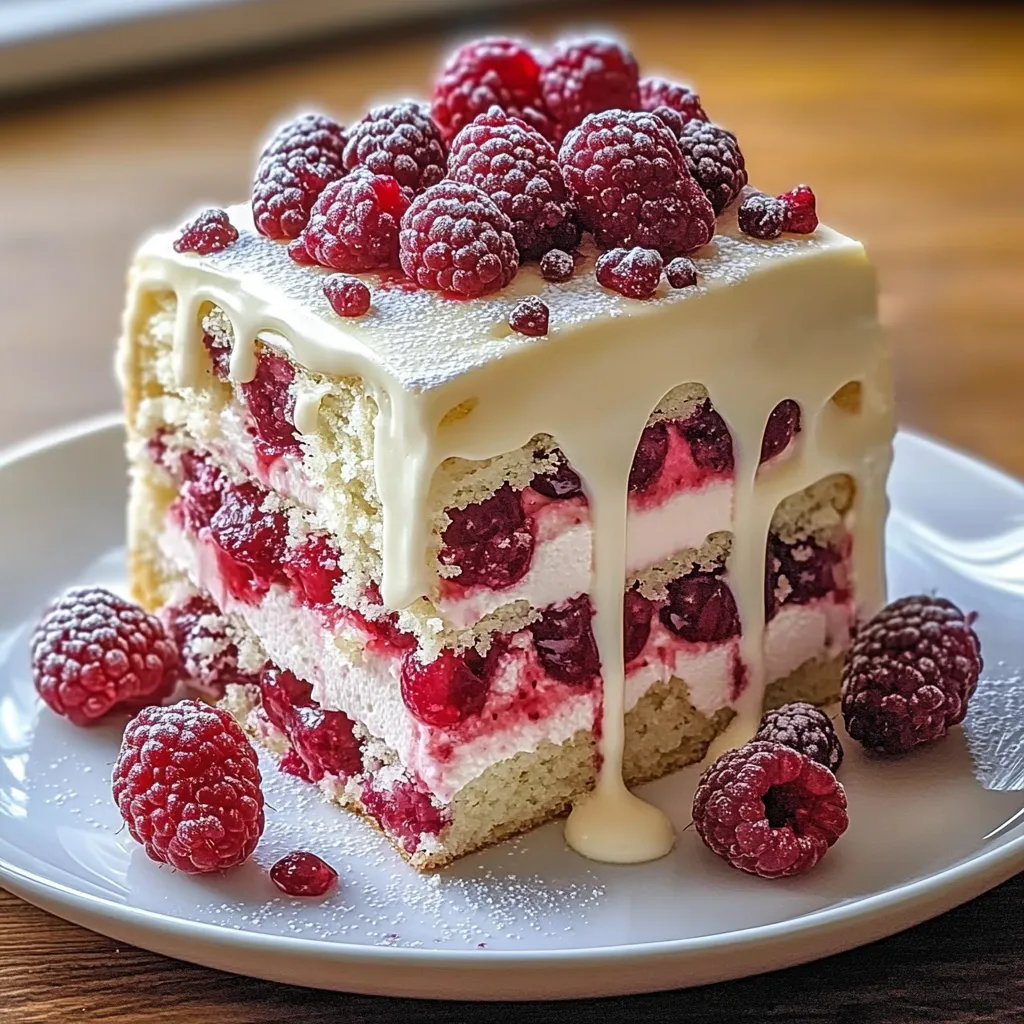
This White Chocolate Raspberry Dream Cake hits the sweet spot between fancy and fun, with buttery vanilla layers meeting smooth white chocolate cream and bright raspberry filling. The way sweet white chocolate mingles with tangy raspberries makes a magical dessert that feels grown-up yet cozy. When you cut into it, you'll see gorgeous layers that make this cake look as amazing as it tastes.
After making this cake for countless celebrations over the years, I've found that using room temp ingredients and handling the batter gently makes all the difference. There's something magical about how the white chocolate cream slightly blends with the fresh raspberry layer, creating a texture that'll stick in your memory long after the last bite.
Must-Have Ingredient Breakdown
- All-Purpose Flour: Go for unbleached to get better structure and taste
- Quality White Chocolate: Look for ones with actual cocoa butter
- Fresh Raspberries: Pick bright, firm ones with no soft spots
- Whole Milk: The fat content helps make your cake softer
- Pure Vanilla Extract: The genuine stuff lifts all the other flavors
- Unsalted Butter: Try European-style for extra richness
Step-By-Step Baking Guide
- Step 1: Nailing Your Cake Layers
- Don't skip bringing ingredients to room temp. Beat butter and sugar till it's super fluffy. Mix in eggs one by one, beating well each time. Switch between adding dry stuff and milk. Don't mix too much at the end. Even out each layer after they cool.
- Step 2: Getting The White Chocolate Cream Just Right
- Cut chocolate into tiny pieces so it melts smoothly. Try using a double boiler for best results. Let melted chocolate cool down before adding to cream. Whip your cream just until soft peaks form first. Fold everything together carefully to keep it airy.
- Step 3: Creating The Perfect Raspberry Layer
- Go for the ripest berries you can find. Mash them lightly to keep that fresh taste. Run through a strainer if you want it smoother. Taste and add sugar if needed. Keep it cold until you're ready to put the cake together.
- Step 4: Putting It All Together
- Make sure cake layers are completely flat. Use a cake board underneath for support. Start with a thin layer of frosting first. Chill between adding layers. Keep fillings away from the edges.
- Step 5: Finishing Touches
- Pick out the prettiest raspberries for the top. Make your chocolate curls while it's cool. Think about how you arrange your decorations. Add mint leaves at the very end. Chill before you serve it.
 Pin it
The best moment for me is watching people's reactions when they see the first slice cut, showing off those beautiful white and pink-red layers. That wow factor gets them every single time.
 Pin it
Keeping It Fresh Tips
Plan ahead for the best results: You can bake the cake layers 3 days early and keep them in the fridge. If you need more time, unfrosted layers freeze well for up to 2 months. The white chocolate cream stays good in the fridge for a day. Once put together, the whole cake lasts 3-4 days refrigerated. For the best flavor, let slices sit out for about 15 minutes before eating.
Frequently Asked Questions
- → Can I bake this in advance?
- Absolutely! It stays fresh in a sealed container in the fridge for up to three days.
- → Why avoid white chocolate chips?
- Melted chips may alter the texture due to added stabilizers. Use a quality white chocolate bar instead.
- → Can frozen raspberries work?
- Thawed frozen raspberries are fine for filling, but stick to fresh ones for garnish.
- → What’s the trick to non-stick cake layers?
- Grease your tins thoroughly, line them with parchment, and optionally dust with flour.
- → Is it okay to make only two layers?
- Yep! Just split the batter and bake a little longer—around 5 to 7 extra minutes.