
 Pin it
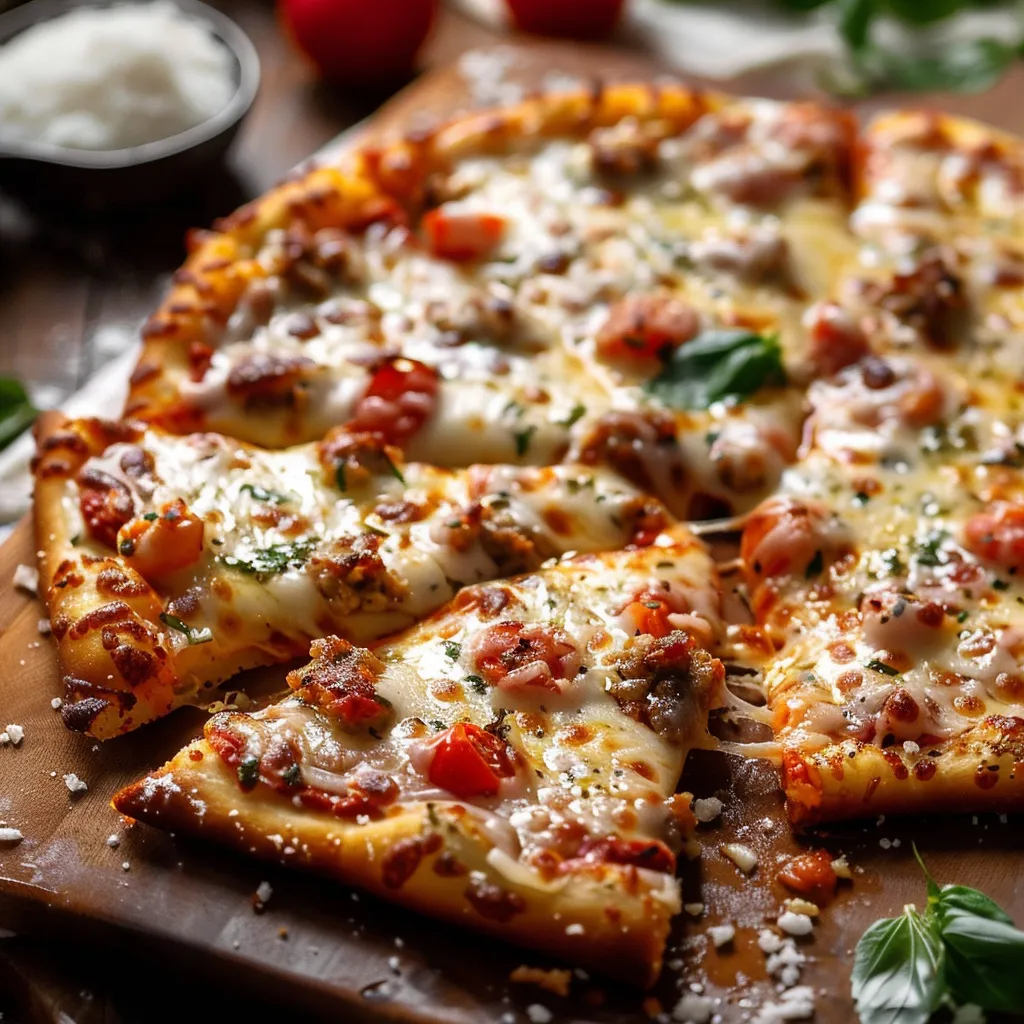
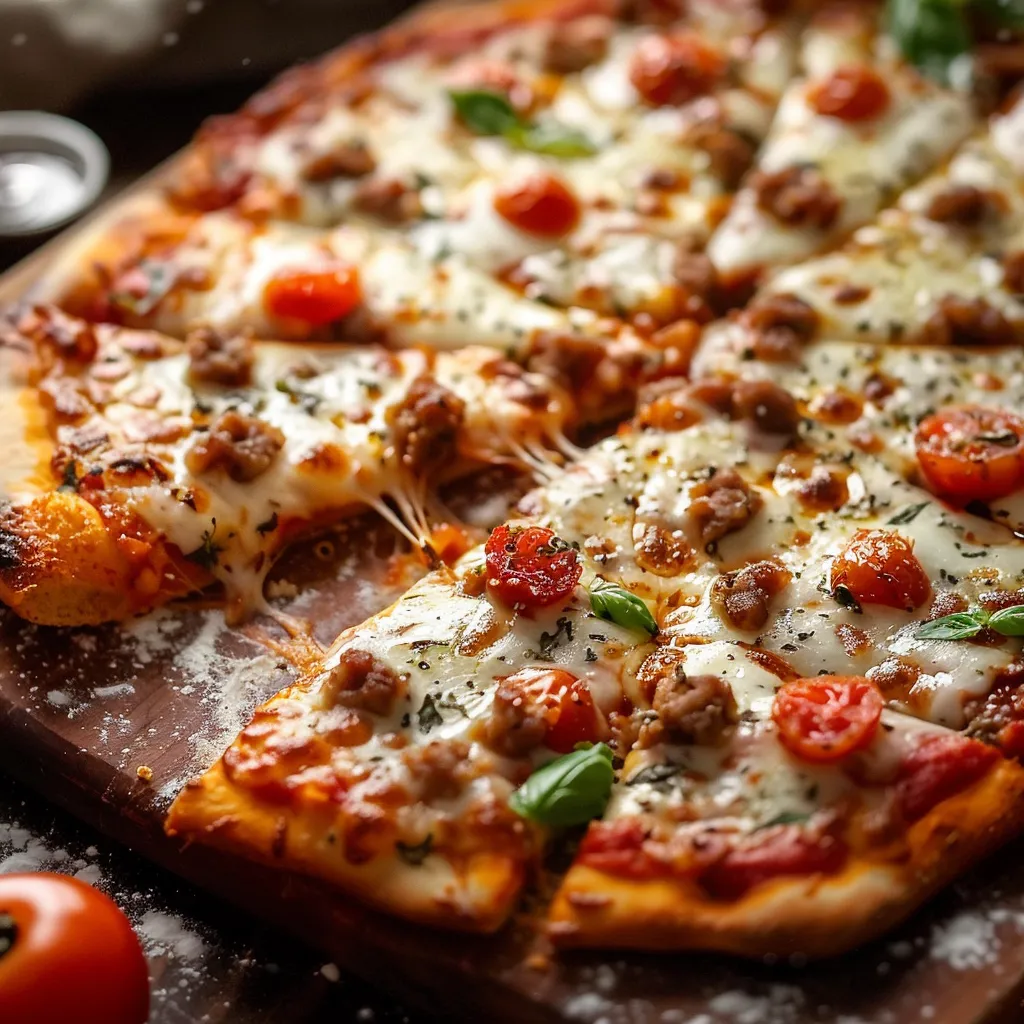
The perfectly crisp edges and classic rectangle shape of this cafeteria-style pizza will take you right back to those fun school lunch moments. Each bite comes with crumbly Italian sausage that's cooked just right, stretchy mozzarella that pulls with every bite, and a crust that's got that perfect mix of crisp outside and soft inside. What makes it so special? The bottom gets a cornmeal coating for that signature crunch, while pre-cooking the crust makes sure everything stays firm under all those tasty toppings.
The first time I got this recipe right in my kitchen, the smell brought my kids running just like we used to rush to the lunch line. I found that letting the dough warm up and handling it carefully was the trick to getting that texture we all remember from school.
Key Pizza Elements
- Pizza dough: This is your base. Good dough bounces back when you touch it, smells a bit yeasty, and has no dry patches. It should feel a bit sticky but not wet when you touch it
- Italian sausage: This gives that classic flavor punch. Go for mild sausage with little fennel seeds and enough fat for taste. Make sure it's fresh and pink without any gray spots
- Cornmeal: This creates that special crunchy bottom. Pick medium-ground yellow cornmeal that feels a little rough between your fingers. Don't use the fine stuff or you won't get the right crunch
- Mozzarella cheese: Always shred it yourself. Look for whole milk mozzarella with a slight yellow color, which means more fat and better melting. Skip the pre-shredded bags since they have stuff that stops it from melting right
Starting Your Pizza Adventure
- First Steps:
- Heat your oven to 400°F - grab a thermometer to make sure it's right. Cover your half sheet pan completely with olive oil, getting into all the corners. Scatter cornmeal evenly across the pan, giving it a little tilt to spread it out. Let your dough sit out for 30 minutes before you start working with it.
- Cooking The Sausage:
- Break the sausage into small marble-sized bits while you cook it so it spreads out well. Keep breaking it up with a wooden spoon as it cooks until all pieces are tiny. Wait for the edges to turn golden brown for the best flavor. Put the cooked sausage on paper towels to soak up extra grease so your pizza stays crispy.
- Putting It Together:
- Start in the middle with your sauce and work your way out in circles for even coverage. Spread your sausage in a grid so every slice gets the same amount. Put cheese all over, making sure to reach the corners for that real school lunch look. Gently push the toppings into the sauce so they don't slide around during baking.
 Pin it
After many family pizza nights, I've noticed the corner pieces always vanish first. My kids argue over them just like I did as a kid, saying they've got just the right mix of crispy edge and soft middle. That cornmeal bottom makes the distinctive crunch that takes me right back to those plastic lunch trays and little milk cartons.
Dinnertime Nostalgia
Make your dinner feel like a school cafeteria by serving pizza squares on metal trays with parchment paper. Add a fresh Caesar salad with creamy dressing, or put out colorful veggie sticks in their own section. Drinks are easy - chocolate milk in small cartons or fruit punch in clear plastic cups works perfectly. You could even set up your counter like a cafeteria line and let everyone slide their trays along to pick their sides.
Fun Variations
Try mixing your mozzarella with some mild cheddar for extra flavor. You can sneak in some thin-sliced bell peppers under the cheese where kids won't spot them. Want something lighter? Swap the Italian sausage for turkey sausage with added fennel and garlic. For a morning twist, add some scrambled eggs and bacon bits. Or make it supreme by throwing in some diced onions, mushrooms, and black olives to the basic recipe.
Storing Leftovers
Put any extra slices in a sealed container with parchment paper between layers so they won't stick together. They'll stay good in the fridge for up to three days. When you want to eat them, warm slices on a hot baking sheet at 350°F for 8-10 minutes until the cheese bubbles. Don't use the microwave - it'll make your crust tough. If you want to freeze some, wrap each piece in plastic wrap then foil, and they'll keep for up to two months.
 Pin it
After trying this recipe many times, I've found the secret to that authentic school pizza taste is getting just the right amount of sauce and cheese, plus that crucial pre-baking step. Making this pizza isn't just about copying a cafeteria favorite - it's about creating new family memories in your kitchen while celebrating those special school day lunches we all remember.
Frequently Asked Questions
- → Can I make this school pizza ahead of time?
- You can cook the sausage topping up to 2 days early and keep it in the fridge. But the pizza tastes best when it's freshly baked.
- → What type of pizza dough works best for this recipe?
- Ready-made dough from the store works fine for a quick meal, but homemade works too. Just let it warm up to room temp before you stretch it out.
- → Why do we pre-bake the crust?
- Baking the crust first makes sure it gets crispy on the bottom and won't turn soggy once you add all your toppings.
- → Can I substitute the Italian sausage?
- Sure thing. Ground beef, turkey or even plant-based meat works well. Just add some Italian spices to get that same yummy flavor.
- → How should I store leftover school pizza?
- Put any extras in a sealed container in your fridge for up to 3 days. Warm it back up in a 350°F oven until it's hot again.