
 Pin it
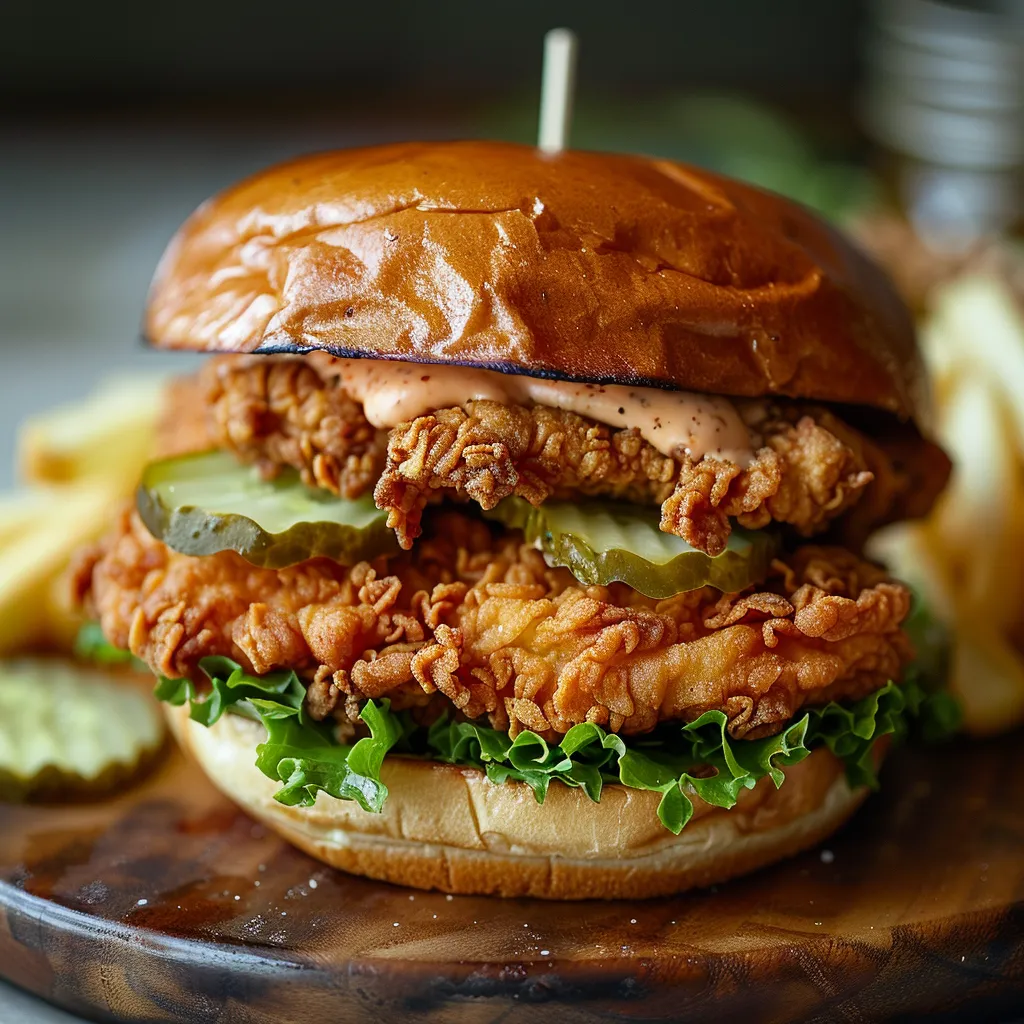
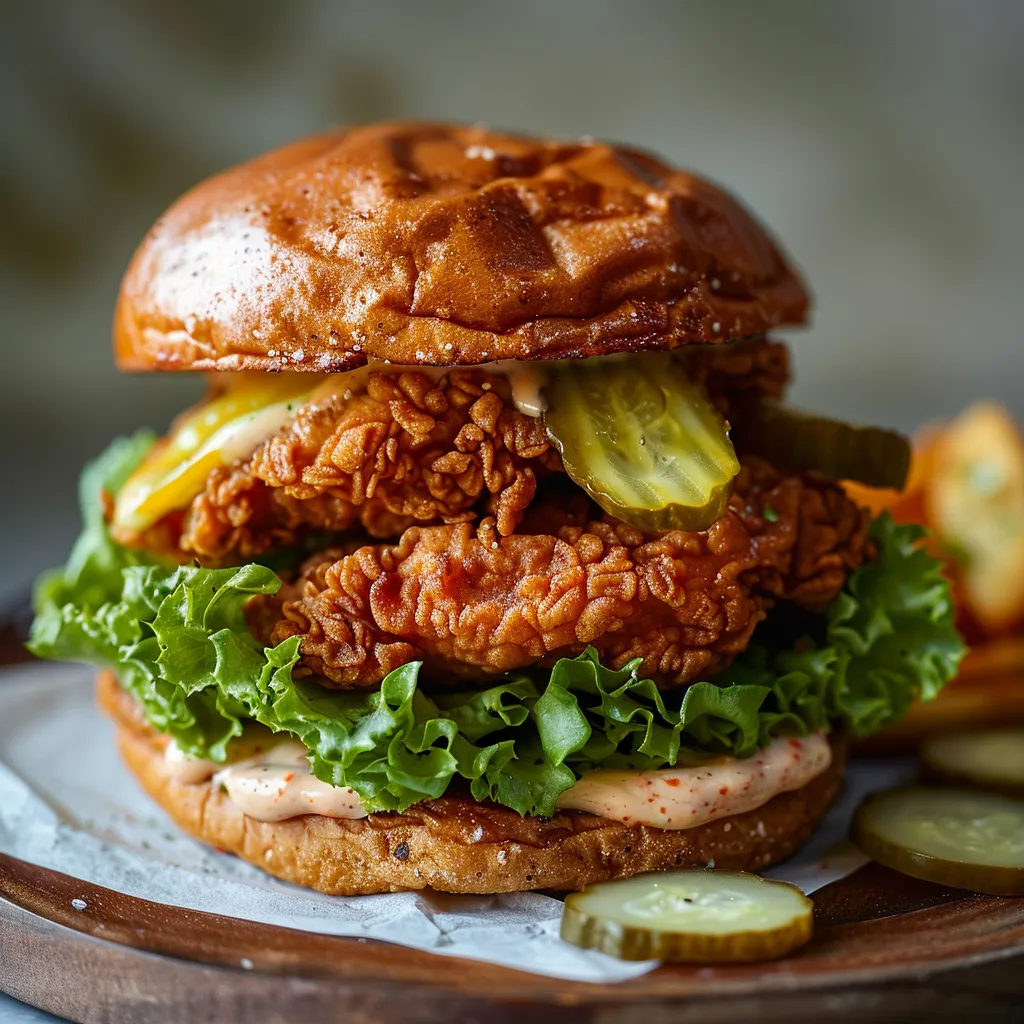
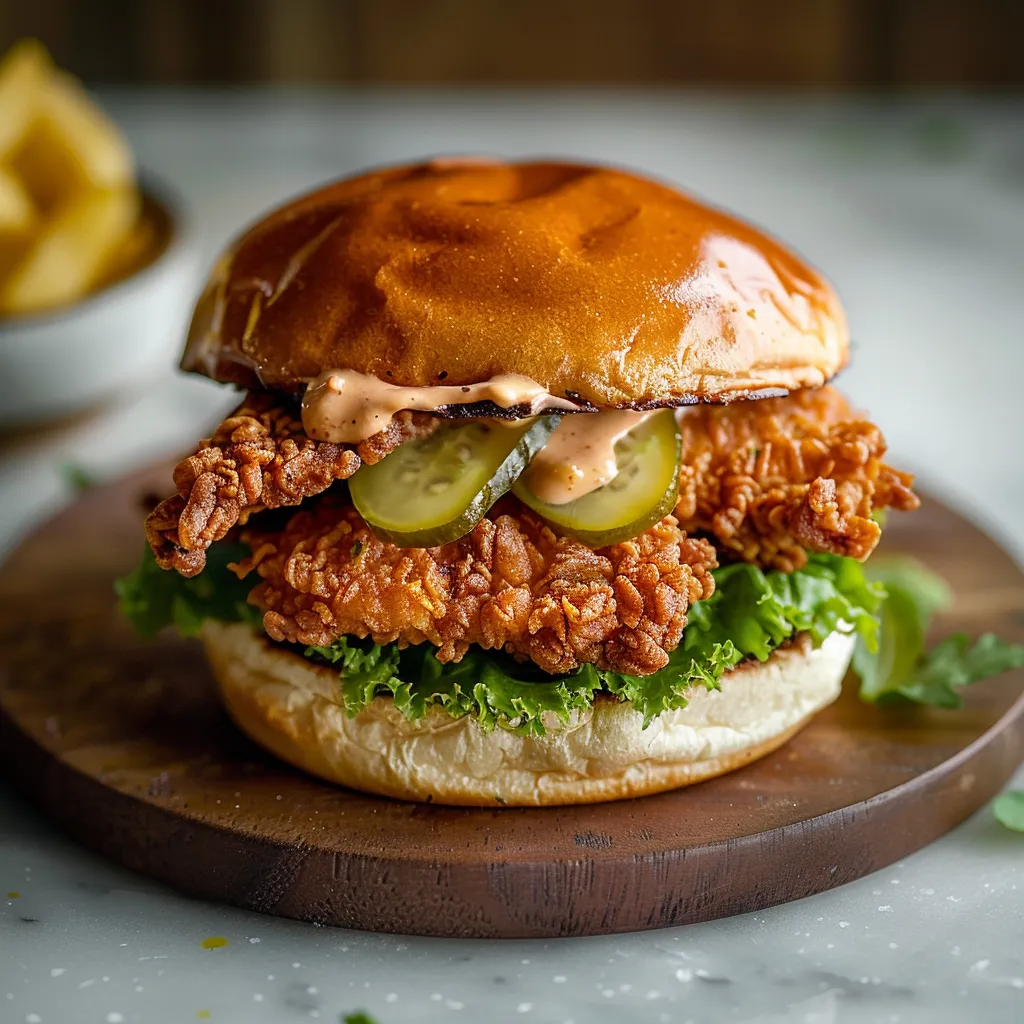
Dill brine fried chicken sandwiches pack a punch with their ultra-juicy inside and super crunchy outside – exactly what makes fried chicken so darn good. The magic happens in the tangy dill pickle marinade that flavors the meat all the way through and makes it incredibly tender. Pop it on a fluffy brioche bun with awesome sauce, and you've got something better than fast food joints while keeping all the good stuff under your control.
I stumbled onto pickle brining after hearing rumors about certain chicken chains doing this behind the scenes. After playing around with times and amounts, this recipe now makes chicken that leaves everyone at the table quiet except for the random "holy cow" between bites. Even my brother in law, who thinks he's some kind of fried chicken expert, said it beats anything he's ever bought from a restaurant.
Essential Brining Elements
- Boneless chicken breasts: Give you the ideal sandwich size
- Sour buttermilk: Breaks down the meat for tenderness
- Pickle juice: Adds that special tang and acid
- Kosher salt: Makes sure flavor goes all the way through
- Sugar: Cuts the sourness and helps browning
- Garlic powder: Adds rich flavor without bits
- Black pepper: Gives subtle heat in the background
- Cayenne pepper: Adds just enough kick
Crunchy Coating Ingredients
- All purpose flour: Makes the basic coating
- Cornstarch: The secret to that amazing crunch
- Powdered sugar: Helps get that beautiful golden color
- Garlic powder: Boosts the overall taste
- Kosher salt: Makes sure the coating isn't bland
- Black pepper: Adds nice flavor throughout
- Cayenne pepper: Gives mild heat that won't burn
- Onion powder: Brings in tasty savory notes
Flawless Cooking Method
- Chicken Preparation:
- Start with room temp chicken breasts for better cooking. If they're super thick, flatten them to about half inch so they cook evenly. This way the coating won't burn before the inside cooks through.
- Brine Creation:
- Mix your buttermilk, pickle juice, and all your spices in a flat dish, stirring well so everything's mixed up good. The acids from the pickle juice and buttermilk work magic on making the meat tender while adding flavor. Cover the chicken pieces completely, wrap it up tight, and stick it in the fridge for at least one hour but you can go up to eighteen hours for stronger flavor.
- Breading Mixture:
- Stir flour, cornstarch, powdered sugar, and all your spices in a big, shallow bowl until they're fully mixed. The cornstarch trick makes the coating super crispy when fried but keeps it light instead of heavy.
- Textured Coating:
- Put a spoonful of the wet brine right into your dry mix and stir a little bit. This makes tiny clumps that stick to the chicken when you coat it, giving you extra crunch after frying. It's a restaurant trick that really makes a difference.
- Dredging Technique:
- Take your chicken out of the brine, let the extra drip off for a sec. Press it firmly into the flour mix, making sure it's totally covered with no wet spots. Flip and do it again, pressing hard to get a good coating. Put your coated pieces on a wire rack and let them sit for ten minutes so the coating sticks better during frying.
- Perfect Frying:
- Get your oil to exactly 350°F using a good thermometer. Carefully put your chicken in the hot oil and keep the temp steady by adjusting your burner. Cook for about five to seven minutes total, turning once halfway, until it's golden brown and hits 165°F inside. Move to a wire rack over paper towels and sprinkle with a little extra salt while it's still hot.
- Sandwich Assembly:
- While your chicken's resting, lightly toast your buns for some nice texture. Spread plenty of your sauce on both sides of the bun. Put your crispy chicken on the bottom bun, then add pickles, lettuce, and cheese if you want. Top with the other half and serve right away while the chicken's still super crispy.
 Pin it
My family goes crazy for the special sauce we put on these sandwiches. The mix of sweet honey, tangy mustard, and smoky BBQ creates something so good it makes the chicken even better. My daughter calls it "the orange stuff that makes everything awesome" and now wants it on everything from veggies to breakfast potatoes.
Tasty Sauce Combination
Mix mayo, yellow mustard, honey, and BBQ sauce in a small bowl, stirring until it's nice and smooth. Add a bit of sriracha if you want some heat that goes great with the chicken. This awesome sauce keeps in the fridge for up to a week in a sealed container. It's not just for sandwiches – try it for dipping veggies, fries, or spreading on wraps and burgers.
Fun Twists To Try
Switch things up by using chicken thighs instead for extra juicy results with more flavor. For a Nashville hot version, brush your freshly fried chicken with a mix of melted butter and cayenne before making your sandwich. Make a Buffalo style by coating your fried chicken in wing sauce before building your sandwich, then top with blue cheese instead of the regular sauce.
Keeping Leftovers Fresh
Store any leftover fried chicken in a sealed container in the fridge for up to three days. For the best way to reheat, put it in a 375°F oven on a wire rack for about ten minutes until it's hot and crispy again. Don't use the microwave as it'll make the coating soggy. Keep the sauce in a separate container in the fridge and make fresh sandwiches when you want them.
 Pin it
What's really cool about this pickle brined crispy chicken sandwich is how it turns basic stuff into something amazing. While it might look like a lot of steps, each one really matters for getting that perfect mix of flavors and textures. I've found that taking time to brine properly and watching the oil temp carefully always gives results that have friends and family asking when I'll cook them again.
Frequently Asked Questions
- → Can I swap chicken breasts for thighs?
- Definitely! You can use either chicken thighs or breasts here. Thighs give a richer, juicier bite, while breasts are leaner. Both work perfectly with the tangy brine.
- → Can I bake instead of fry these?
- Sure thing! Bake at 425°F for 15-20 minutes until it hits 165°F inside. Spritz the coated chicken with cooking spray before baking for a crispier outcome. While it won't be as crunchy as fried, it'll still be tasty!
- → What pickle juice is best to use?
- Go with dill pickle juice—not sweet. The brine from your favorite jar of dill pickles works great, especially if you already enjoy that brand's flavor!
- → How can I check oil temperature without a thermometer?
- Toss a small bread chunk into the oil. If it dances and turns golden in about 60 seconds, your oil's ready at around 350°F. Bubbles should form gently around the chicken; too much splashing means it's overheated.
- → Can I prepare the chicken ahead of time?
- Yes! You can fry it up to 2 hours early and keep it warm on a rack in a 200°F oven. That said, these sandwiches are best put together and eaten not long after frying.