
 Pin it
A smooth, decadent chocolate milkshake combines luxurious ice cream with silky milk, making an over-the-top treat that knocks out even the strongest chocolate urges. This souped-up version turns a basic milkshake into a coffee-shop-worthy drink that'll make you forget about those expensive shake places.
In my childhood, whipping up chocolate milkshakes was our weekend tradition. I've tinkered with this for ages, trying all sorts of chocolate combos and measurements until I landed on this perfect mix that balances richness with drinkability.
Key Ingredients
- Chocolate Ice Cream: Go for top-shelf ice cream containing actual cocoa butter for the boldest flavor and silkiest feel. The extra fat makes your shake incredibly smooth.
- Whole Milk: The fat in whole milk helps it mix perfectly with ice cream. You can try lighter milks, but whole milk gives you that classic milkshake experience.
- Chocolate Sauce: Pick a quality sauce made from genuine chocolate instead of fake-flavored syrups. It adds complexity and makes sure chocolate hits your taste buds in every sip.
Making Your Shake
- Step 1: Get Ready
- Let your ice cream sit out for about 5 minutes to soften slightly. This helps it blend easier and won't tax your blender motor. While waiting, stick your serving glasses in the freezer – this keeps your shake from melting too fast.
- Step 2: Load The Blender
- Start by putting chocolate ice cream in the blender, then pour in just half the milk. Beginning with less milk lets you control how thick it ends up. Drizzle chocolate sauce over the ice cream so it doesn't all sink to the bottom.
- Step 3: Blending Method
- Start with low speed for about 15-20 seconds to break down the ice cream chunks, then bump it up to medium. You'll know you're on the right track when you see a little tornado forming in the middle. Add more milk bit by bit if you want it thinner.
- Step 4: Serve It Up
- Pour your creation into those cold glasses right after blending. Don't wait around – serving immediately keeps that perfect texture before melting starts. Top it off with whatever garnishes look good to you.
 Pin it
The way my family likes it best is when I coat the inside of the glass with dark chocolate sauce before I pour in the shake – it creates these gorgeous chocolate streaks and makes everything taste even more amazing.
 Pin it
This chocolate shake has turned into my go-to dessert drink that everyone asks for whenever we get together. Using fancy ingredients and paying attention to how you make it creates something that feels both old-school and fancy – it's basically heaven for chocolate fans.
Frequently Asked Questions
- → Can I make these tiny treats ahead of time?
- Sure, you can fix them 2 days before and keep the apple mix separate. Just warm up the apples when you're ready to serve.
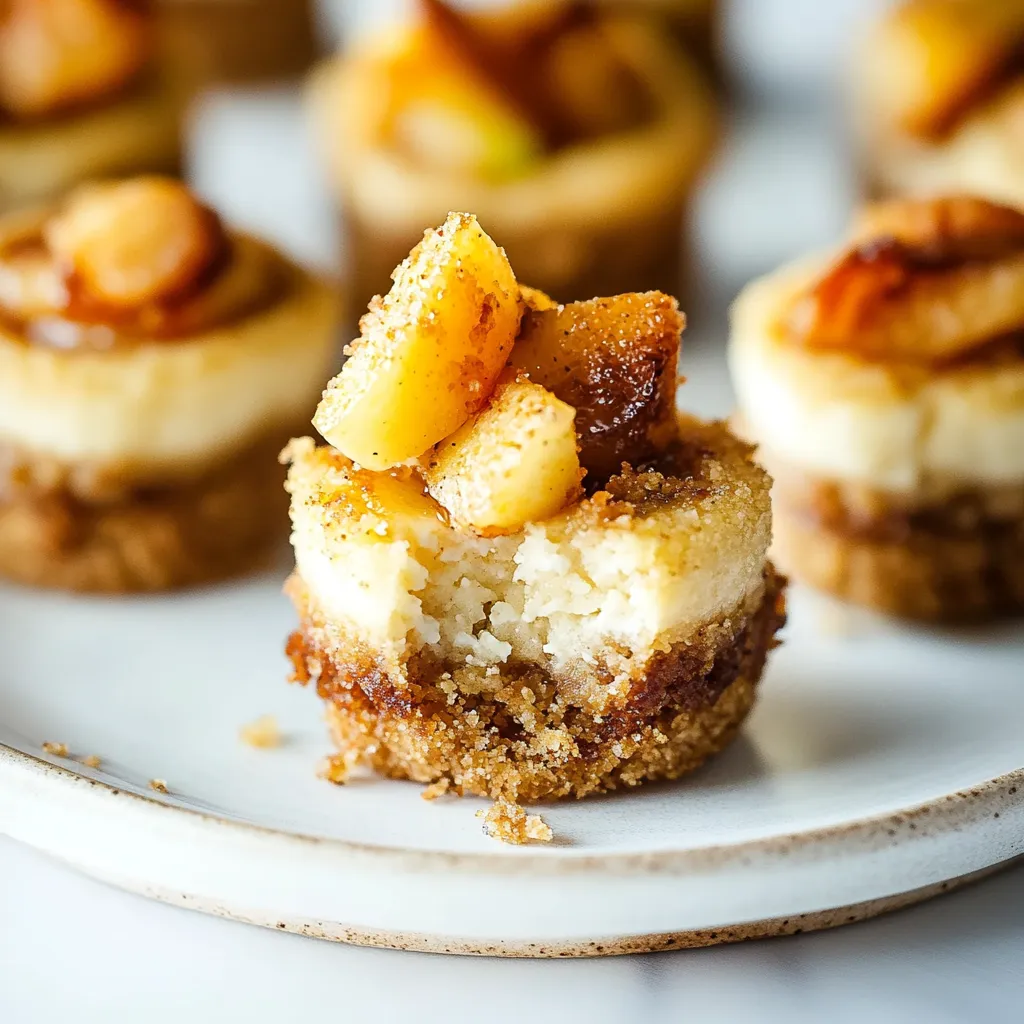
- → Why did my cheesecakes split on top?
- Splits happen when you mix too much or change the heat too fast. Use low speed when mixing and cool them slowly as the steps show.
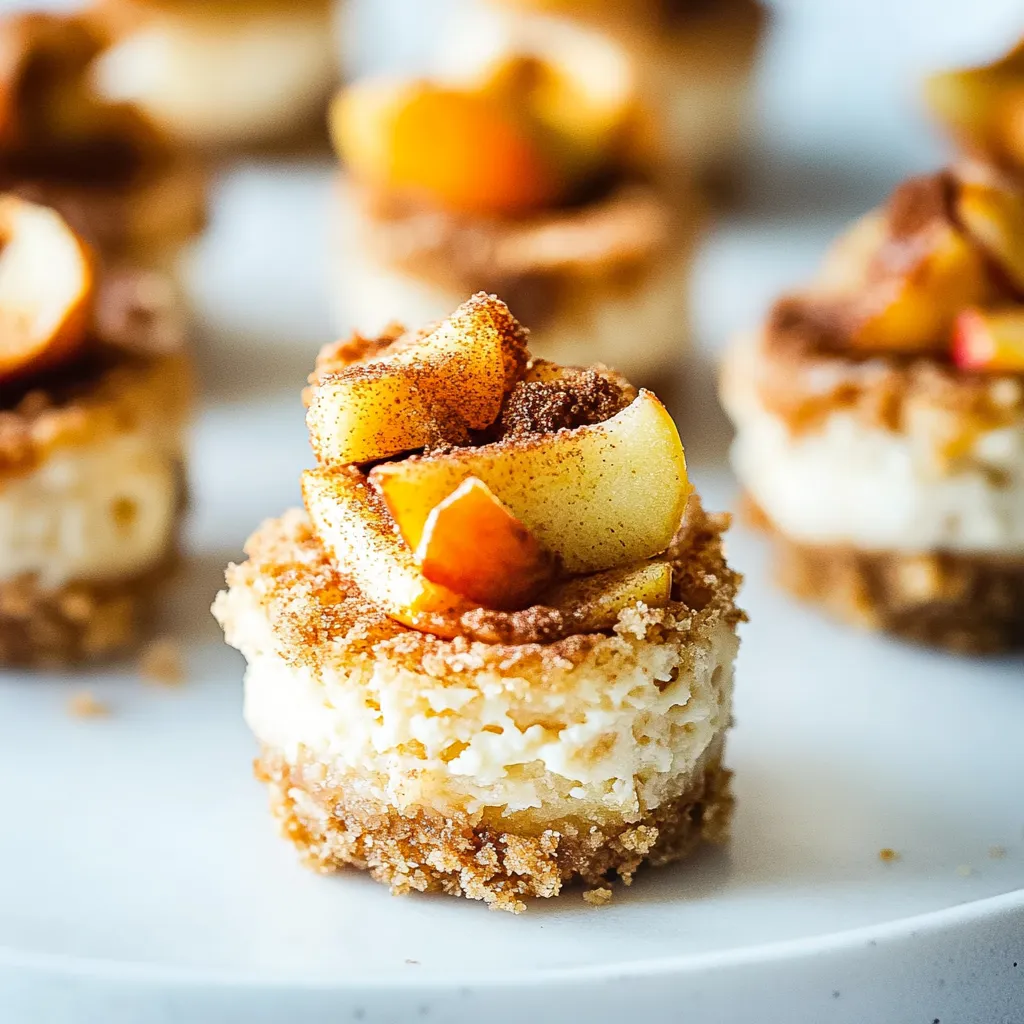
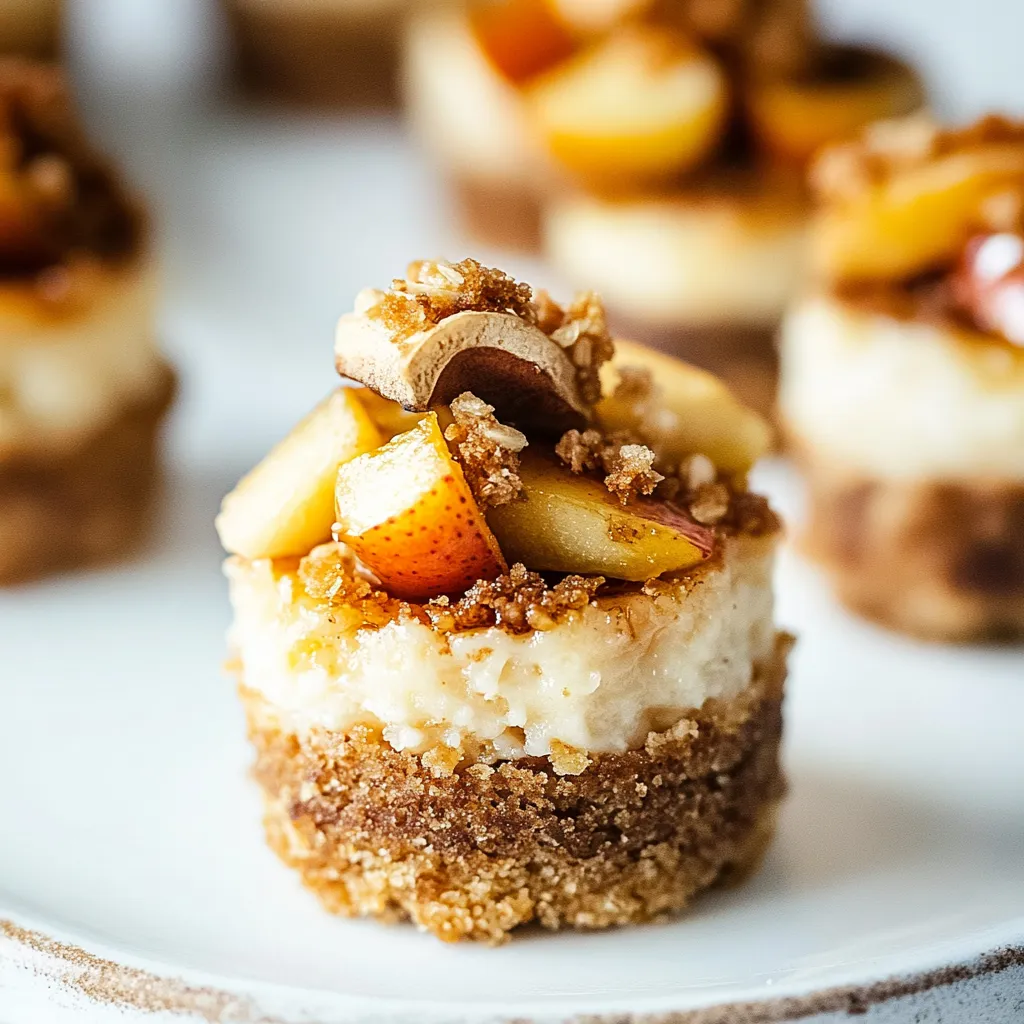
- → What kind of apples work best?
- Granny Smith apples are great since they're tart enough to balance the sweet caramel and they stay firm while cooking.
- → How can I tell when the cheesecakes are ready?
- They should look set but still have a tiny wobble in the middle when you lightly shake the pan.
- → Can I freeze these little treats?
- Sure, you can freeze them without the apple mix for up to 2 months. Let them thaw overnight and add fresh warm apple topping before you serve.