
 Pin it
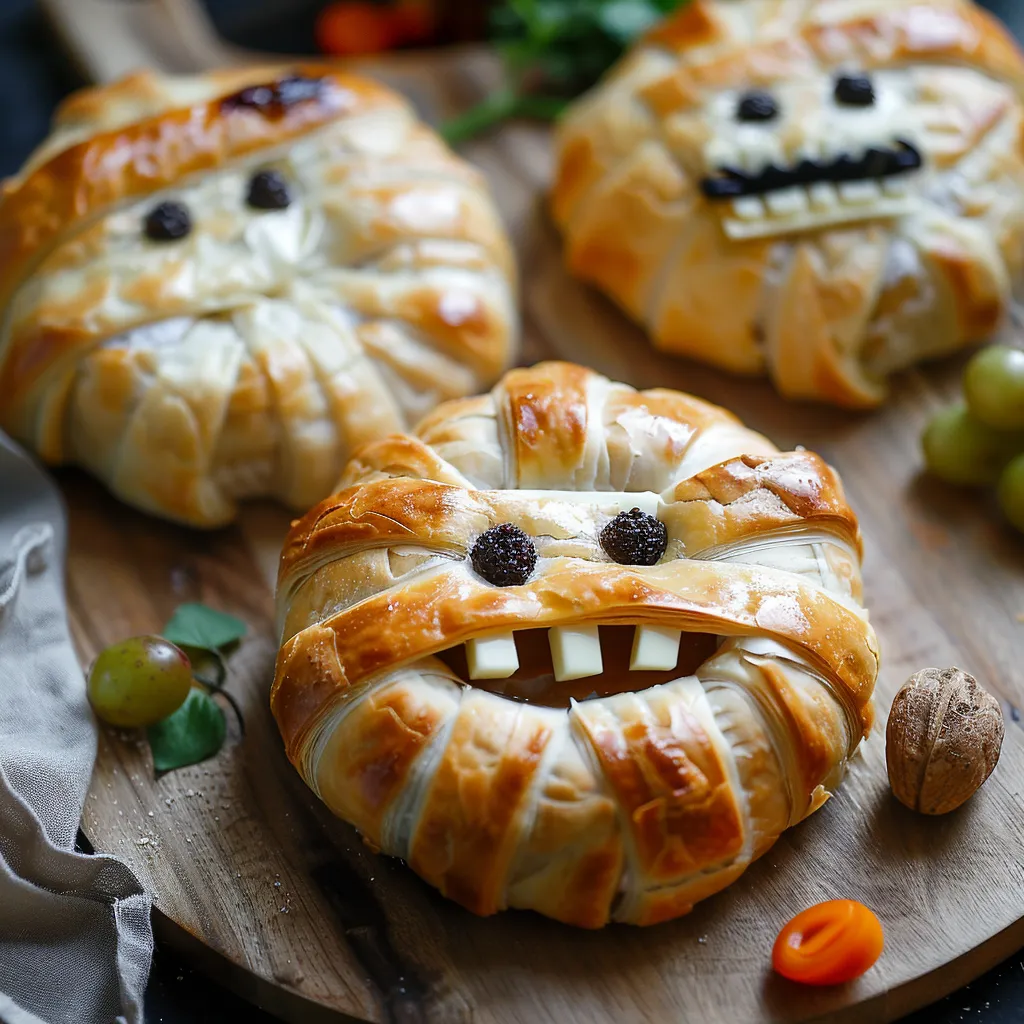
Melty cheese wrapped in golden pastry bands creates a fun Halloween mummy brie that's both cute and tasty. The hot oven turns regular cheese into a gooey, melted center that works great with the crunchy pastry outside. This spooky cheese treat looks amazing and tastes so good it'll be the talk of your Halloween party.
The first time I made this fun party snack was at our block's Halloween get-together a few years back, and now folks ask for it every time October comes around. It's always fun watching people's reactions when they spot the cute mummy design, and then again when they taste that amazing mix of warm cheese and sweet filling. Even my nephew who usually turns his nose up at cheese couldn't stop eating it, which goes to show that food that looks cool might actually taste better!
Essential Ingredients
- Round brie wheel: Melts perfectly when baked
- Apple butter: Brings fall sweetness and spices
- Puff pastry: Makes crispy mummy bandages
- Whole egg: Creates a nice golden finish
- Red pepper pieces: Works as the mummy's eyes
- Sliced black olives: Makes creepy pupils
- Sliced green apples: Adds a cool, fresh option
- Various crackers: Gives something sturdy for dipping
Flawless Method
- Brie Preparation:
- Start with brie that's cool but not frozen so it keeps its shape while cutting. Use a sharp bread knife to cut a shallow ring around the top, about one-eighth inch down. Carefully lift off this top rind piece but keep the sides and bottom covered. This lets you add fillings while keeping the cheese from falling apart during cooking.
- Flavor Infusion:
- Drop apple butter or your favorite jam right onto the bare cheese surface. Spread it around but leave a little space at the edges so it won't bubble over. For extra flavor, make tiny cuts in the cheese first before adding your filling. Put the rind piece back on top and press down gently.
- Pastry Preparation:
- Work fast while the pastry stays cool. Unfold the thawed pastry on a floured counter. Cut about eight strips in different widths for a realistic mummy look. Use skinnier strips for going around curves and wider ones for covering top and bottom.
- Mummy Construction:
- Put your cheese in the middle of a parchment-lined baking sheet. Start wrapping pastry strips around it, leaving small gaps between them so steam can escape and to make it look like real mummy wrappings. Cross some strips over others for a 3D effect. Tuck the ends under the cheese so they stay put.
- Facial Features:
- Place two small red pepper bits on top for the eye sockets. Put black olive slices on these to make pupils, finishing the spooky face. Put them a bit off-center so your mummy looks more fun and real.
- Finishing Touch:
- Paint the whole pastry with beaten egg using a brush, making sure you cover all parts for even browning. Don't soak the pastry or it won't puff up right. If your wrapped cheese feels warm, stick it in the fridge for 5-10 minutes before baking so the pastry works better.
- Perfect Baking:
- Stick it in your preheated oven on the middle shelf so heat hits it evenly. Bake until the pastry turns golden and crispy, usually 15-18 minutes. Watch it closely at the end because it can brown suddenly. The cheese should give a little when pressed, showing it's nicely melted inside.
- Proper Resting:
- Let your mummy brie sit for five minutes after baking. This short cooling time helps the melty cheese set up slightly while staying nice and gooey. It also means your guests won't burn their mouths on that first bite. Carefully move it to a serving plate with all the extras around it.
 Pin it
What I really love about this fun party food is how you can change it up. When I'm having friends over, I often use fig jam with a dash of bourbon for grown-up taste. For family parties with kids around, apple butter gives that familiar yummy fall flavor. My sister usually stays away from heavy appetizers, but she always makes room for this mummy brie, saying the crispy outside perfectly balances the rich cheese.
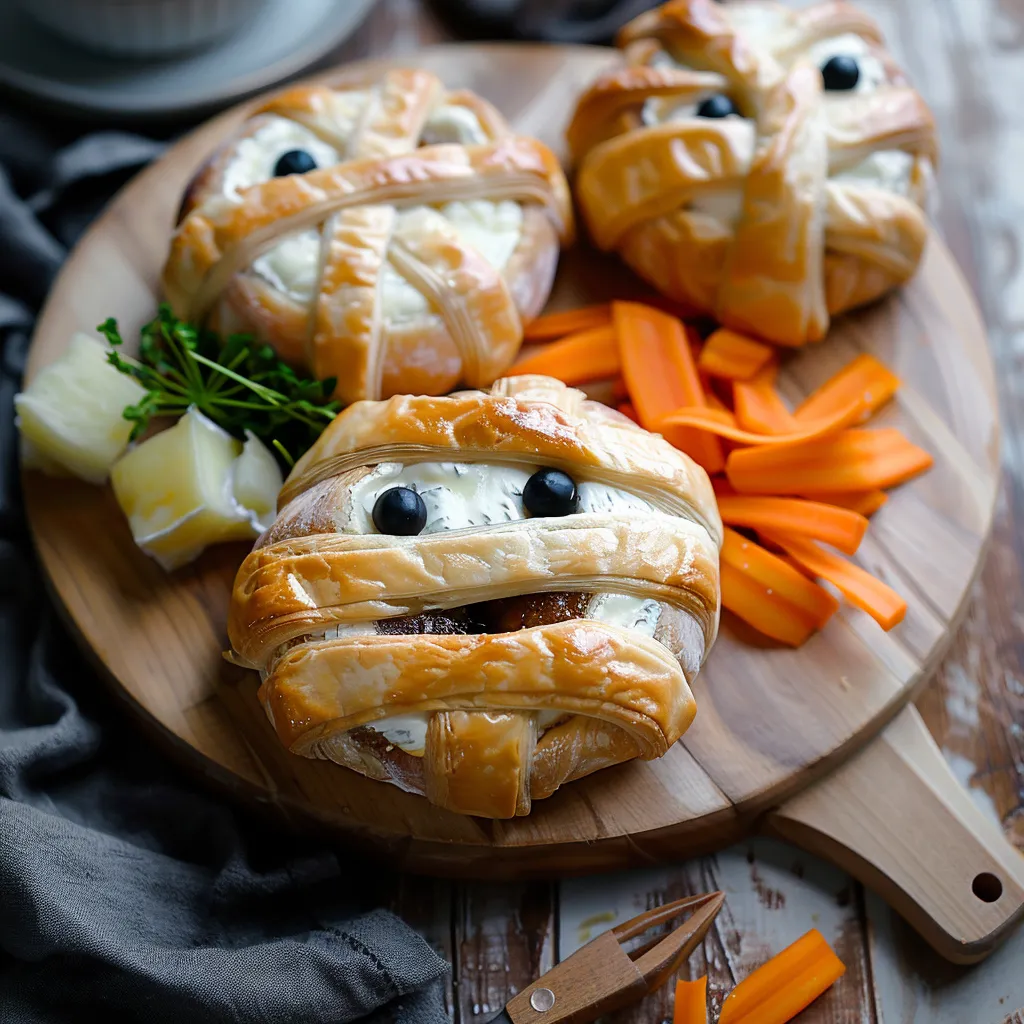
Stunning Display Ideas
Put your cute mummy on a wooden board with apple and pear slices and different crackers all around for a wow-factor display. Add some grape bunches and sprinkle nuts around to make a complete cheese platter. For a fancy touch, tuck small bits of fresh rosemary around the edges and put out a tiny pot of honey with a dipper for folks who want extra sweetness.
Fun Twists
Switch up this Halloween snack by trying different fillings like onions cooked down with thyme for a savory option or cranberry sauce with orange peel for holiday vibes. Make a spicy version using hot pepper jelly or spicy honey if you like heat. For sweet-tooth friends, try a dessert version with chocolate hazelnut spread inside and serve with fresh strawberries and graham crackers.
Plan Ahead Tricks
Get this fun treat ready up to a day before by doing all the assembly steps through the wrapping. Cover it loosely with plastic and pop it in the fridge. Add the egg wash just before you bake for best results. Or freeze your fully wrapped unbaked mummy for up to a month. When you want to serve it, brush with egg and bake straight from frozen, just adding about five more minutes to the cooking time.
 Pin it
What's really great about this pastry-wrapped mummy brie is how it looks super impressive but isn't hard to make. While your guests are saying how cute it looks, you'll be thinking about how easy it was to put together. I'm a big fan of party foods that don't keep me stuck in the kitchen instead of chatting with friends, and this fun cheese does exactly that while making everyone smile when they see it. You can't get much better for Halloween snacks than this cute and spooky cheese!
Frequently Asked Questions
- → Can I make this ahead of time?
- Definitely! You can assemble it a day in advance. Get it ready to bake, then cover and refrigerate. Before baking, brush on the egg wash and give it 2-3 more minutes in the oven since it’ll be chilled.
- → How should I serve it once baked?
- Baked brie is best eaten warm when it’s soft and gooey. Pair it with green apple slices, crackers, or breadsticks. It’s a fun centerpiece on a snack board surrounded by your favorite bites!
- → Can I swap the cheese?
- Brie works best, but camembert is a close substitute. For something bold, go with goat cheese, but keep in mind it won’t melt the same. Choose cheese in wheel form with a rind!
- → What other fillings can I use?
- Jams like fig, apricot, or cranberry are great. Want savory? Try caramelized onions or pesto. Even honey with walnuts or pecans is yummy. Customize it to your taste!
- → How do I know it’s fully baked?
- The pastry will be puffed and golden brown after about 15-18 minutes at 400°F. If the center feels soft when pressed, it’s melted inside. Let it cool just a bit before serving.