
 Pin it
My go-to butternut squash cooking technique has become the backbone of countless fall meals that need barely any work. When you roast this veggie, it gets incredibly sweet on its own, and the biggest bonus? You can totally skip the annoying peeling part.
I stumbled onto this no-fail method when I was rushed but wanted homemade squash soup. Now I use it all the time even when I'm not in a hurry because it turns out amazing every single time.
Ingredients
- Butternut squash: Around 3 pounds; try to find one with an extra long neck so you'll get more flesh and fewer seeds
- Avocado oil: Helps create gorgeous brown edges and doesn't add competing flavors
- Salt: Boosts the natural sweetness and makes the squash taste even better
Cooking Process
- Heat Your Oven:
- Turn it up to 425°F, which will give you those tasty browned edges without burning. While it warms up, grab your stuff and line a baking sheet with parchment so cleanup won't be a headache later.
- Cut Your Squash:
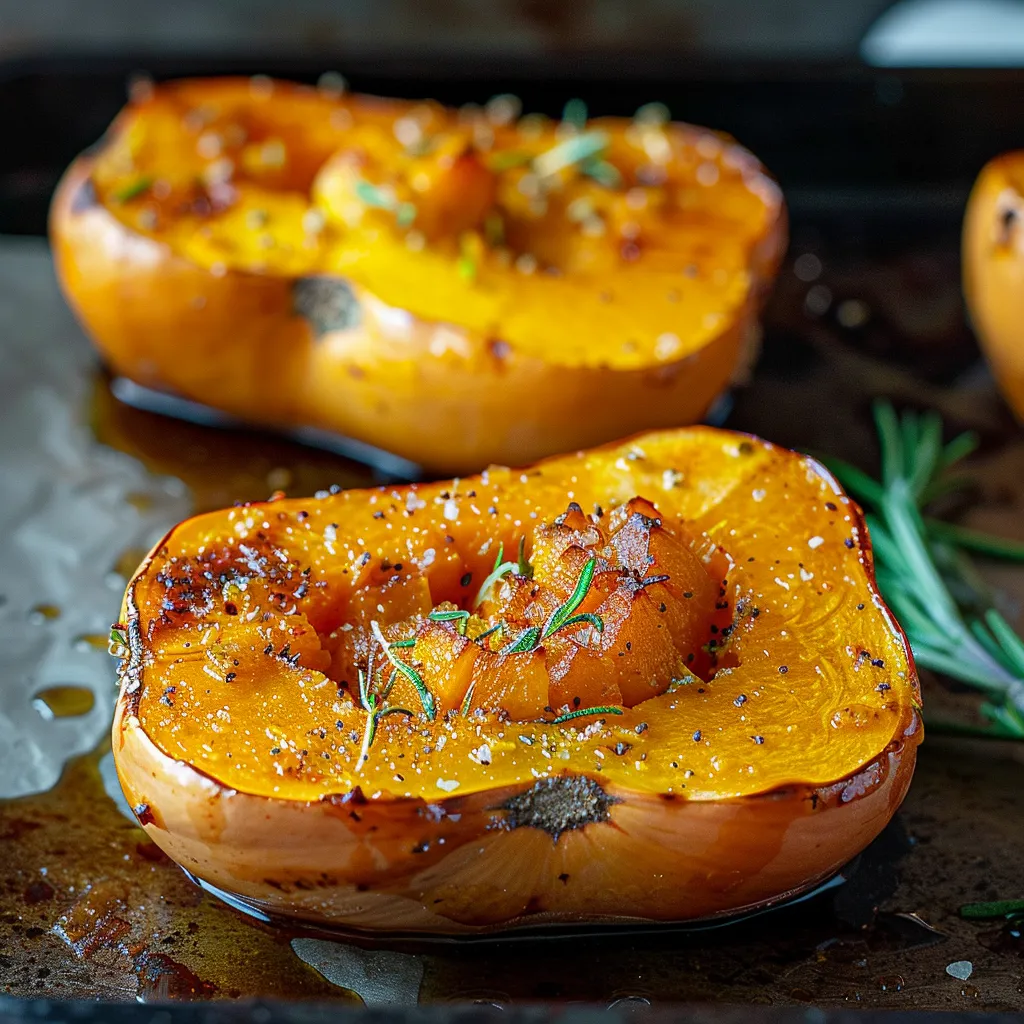
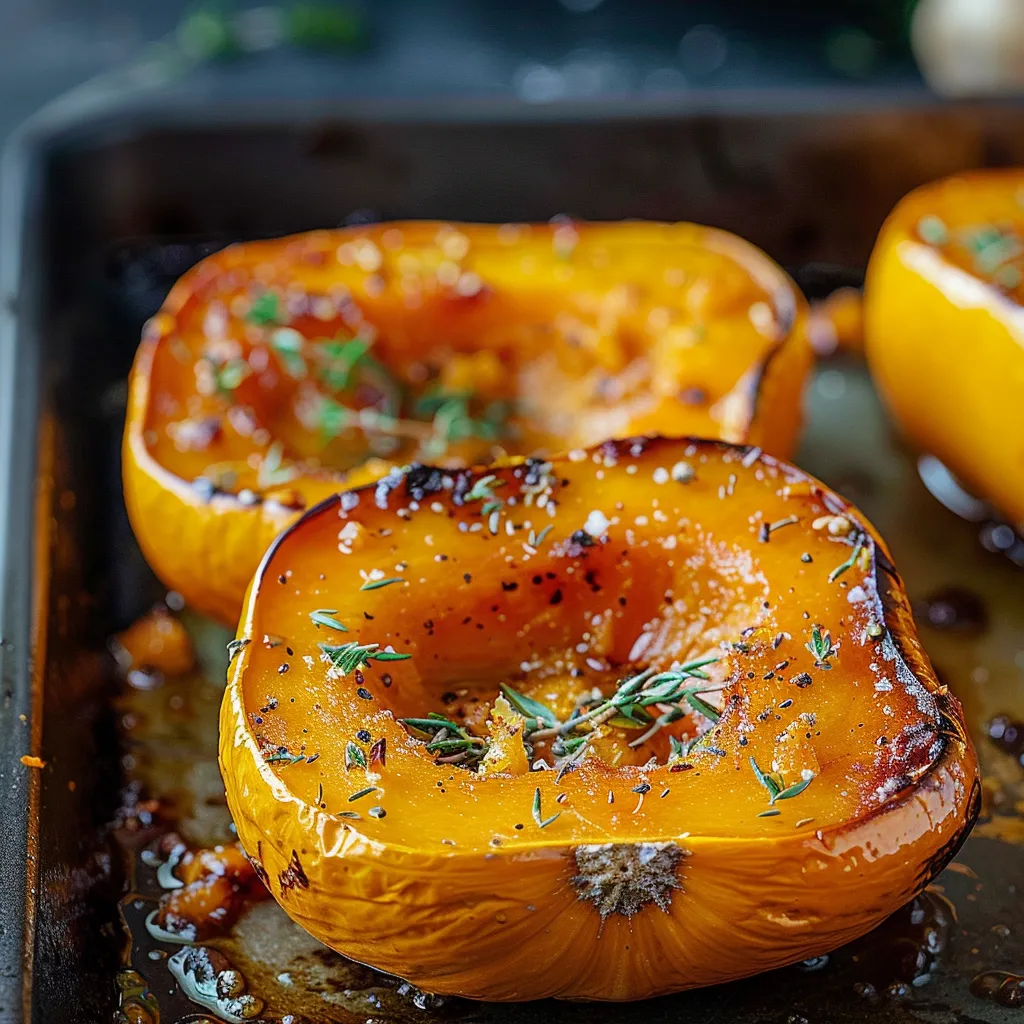
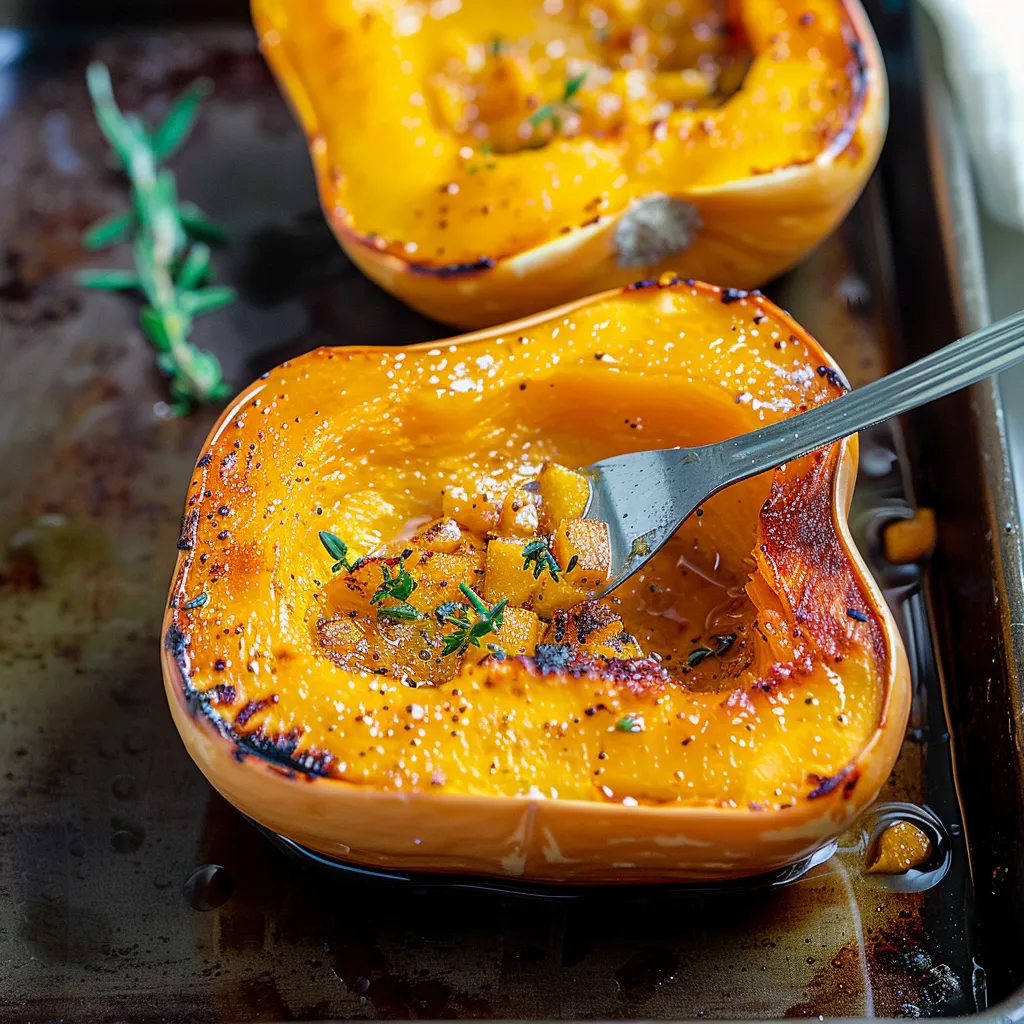
- Slice the butternut from top to bottom with a good sharp knife. Don't rush this - these squashes can be pretty tough. After cutting, scoop out all the seeds and stringy bits to make a clean hollow. Don't bother with peeling - the skin will come off super easily after cooking.
- Add Basic Flavors:
- Pour about a tablespoon of avocado oil on each half and rub it all over the flesh with your hands. This direct touch helps it brown up nicely. Sprinkle salt everywhere, especially in the hollow part where flavors really soak in while cooking.
- Cook It Through:
- Put both halves face-down on your sheet. This way the edges get nicely browned while steam gets trapped underneath to cook everything evenly. Leave it for 40-45 minutes until you can easily stick a fork into the thickest part and see nice browning around the edges.
 Pin it
Over time, I've grown to really love the neck part of butternut squash. It doesn't have any seeds and gives you the sweetest, most solid flesh - perfect for making smooth purees. My kid used to hate all veggies but now actually asks for this roasted squash, which I count as a huge win in my parenting book.
Prep Ahead Tips
Funny enough, roasted butternut squash actually tastes better after it sits in the fridge overnight. The sugars keep developing, making it even tastier the next day and perfect for planning meals ahead. I often cook several squashes on Sundays to use throughout my week in everything from breakfast bowls to dinner sides.
Fun Serving Suggestions
Though it tastes great with just salt and pepper, you can dress up roasted butternut squash in so many ways. Try pouring a bit of maple syrup and sprinkling cinnamon for a sweeter version, or add some cayenne with lime zest for a surprising kick. For a full meal, throw on some toasted pumpkin seeds, crumbled goat cheese, and a drizzle of thick balsamic.
Fix Common Problems
If you're struggling to cut your squash safely, pop the whole thing in the microwave for 2-3 minutes first to soften it up a bit. This trick has made my life so much easier, especially with really big squashes. And if you hate waste, you can clean those seeds, rinse them well, and roast them with spices for a healthy snack that's a lot like roasted pumpkin seeds.
Keeping Leftovers Fresh
Store any extra roasted squash in a sealed container in your fridge for up to 5 days. The flavor actually gets better during storage, so day-two squash tastes particularly amazing. To keep it even longer, stick portion-sized amounts in the freezer for up to 3 months. When you want to use it, just let it thaw in the fridge overnight and warm it up gently or toss it cold into salads.
 Pin it
Frequently Asked Questions
- → What’s the ideal temperature for roasting squash?
The best roasting temperature for butternut squash is 425°F. This ensures perfect caramelization and a soft texture.
- → Should I peel the squash before roasting?
No need! Just roast the squash with the skin on. It’s easy to scoop out the flesh when it’s done cooking.
- → How can I tell if butternut squash is done roasting?
Check that the thickest part is tender when poked, and the edges are browned. This usually happens around 40–45 minutes.
- → Can I cube the squash instead of cutting it in halves?
Absolutely. Dice it, coat with oil, and bake at 400°F for 25–30 minutes. Toss halfway for even browning.
- → How long does roasted squash stay fresh?
Store it in a sealed container in the fridge for up to 4–5 days.